You are currently viewing Easy Orange Chicken: A Crispy, Sweet & Savory Homemade Meal

Easy Orange Chicken: A Crispy, Sweet & Savory Homemade Meal

Why This Orange Chicken Recipe Beats Takeout 

We’ve all been there. That powerful craving hits for something irresistibly sweet, tangy, and savory—the kind of meal that comes in a familiar white cardboard box. You place the order, you wait, and finally, that iconic aroma fills your kitchen. But too often, the reality doesn’t live up to the dream. The chicken is soggy, the sauce is cloyingly sweet and one-dimensional, and you’re left feeling a little disappointed, and a lot like you overpaid.

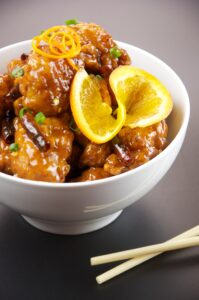
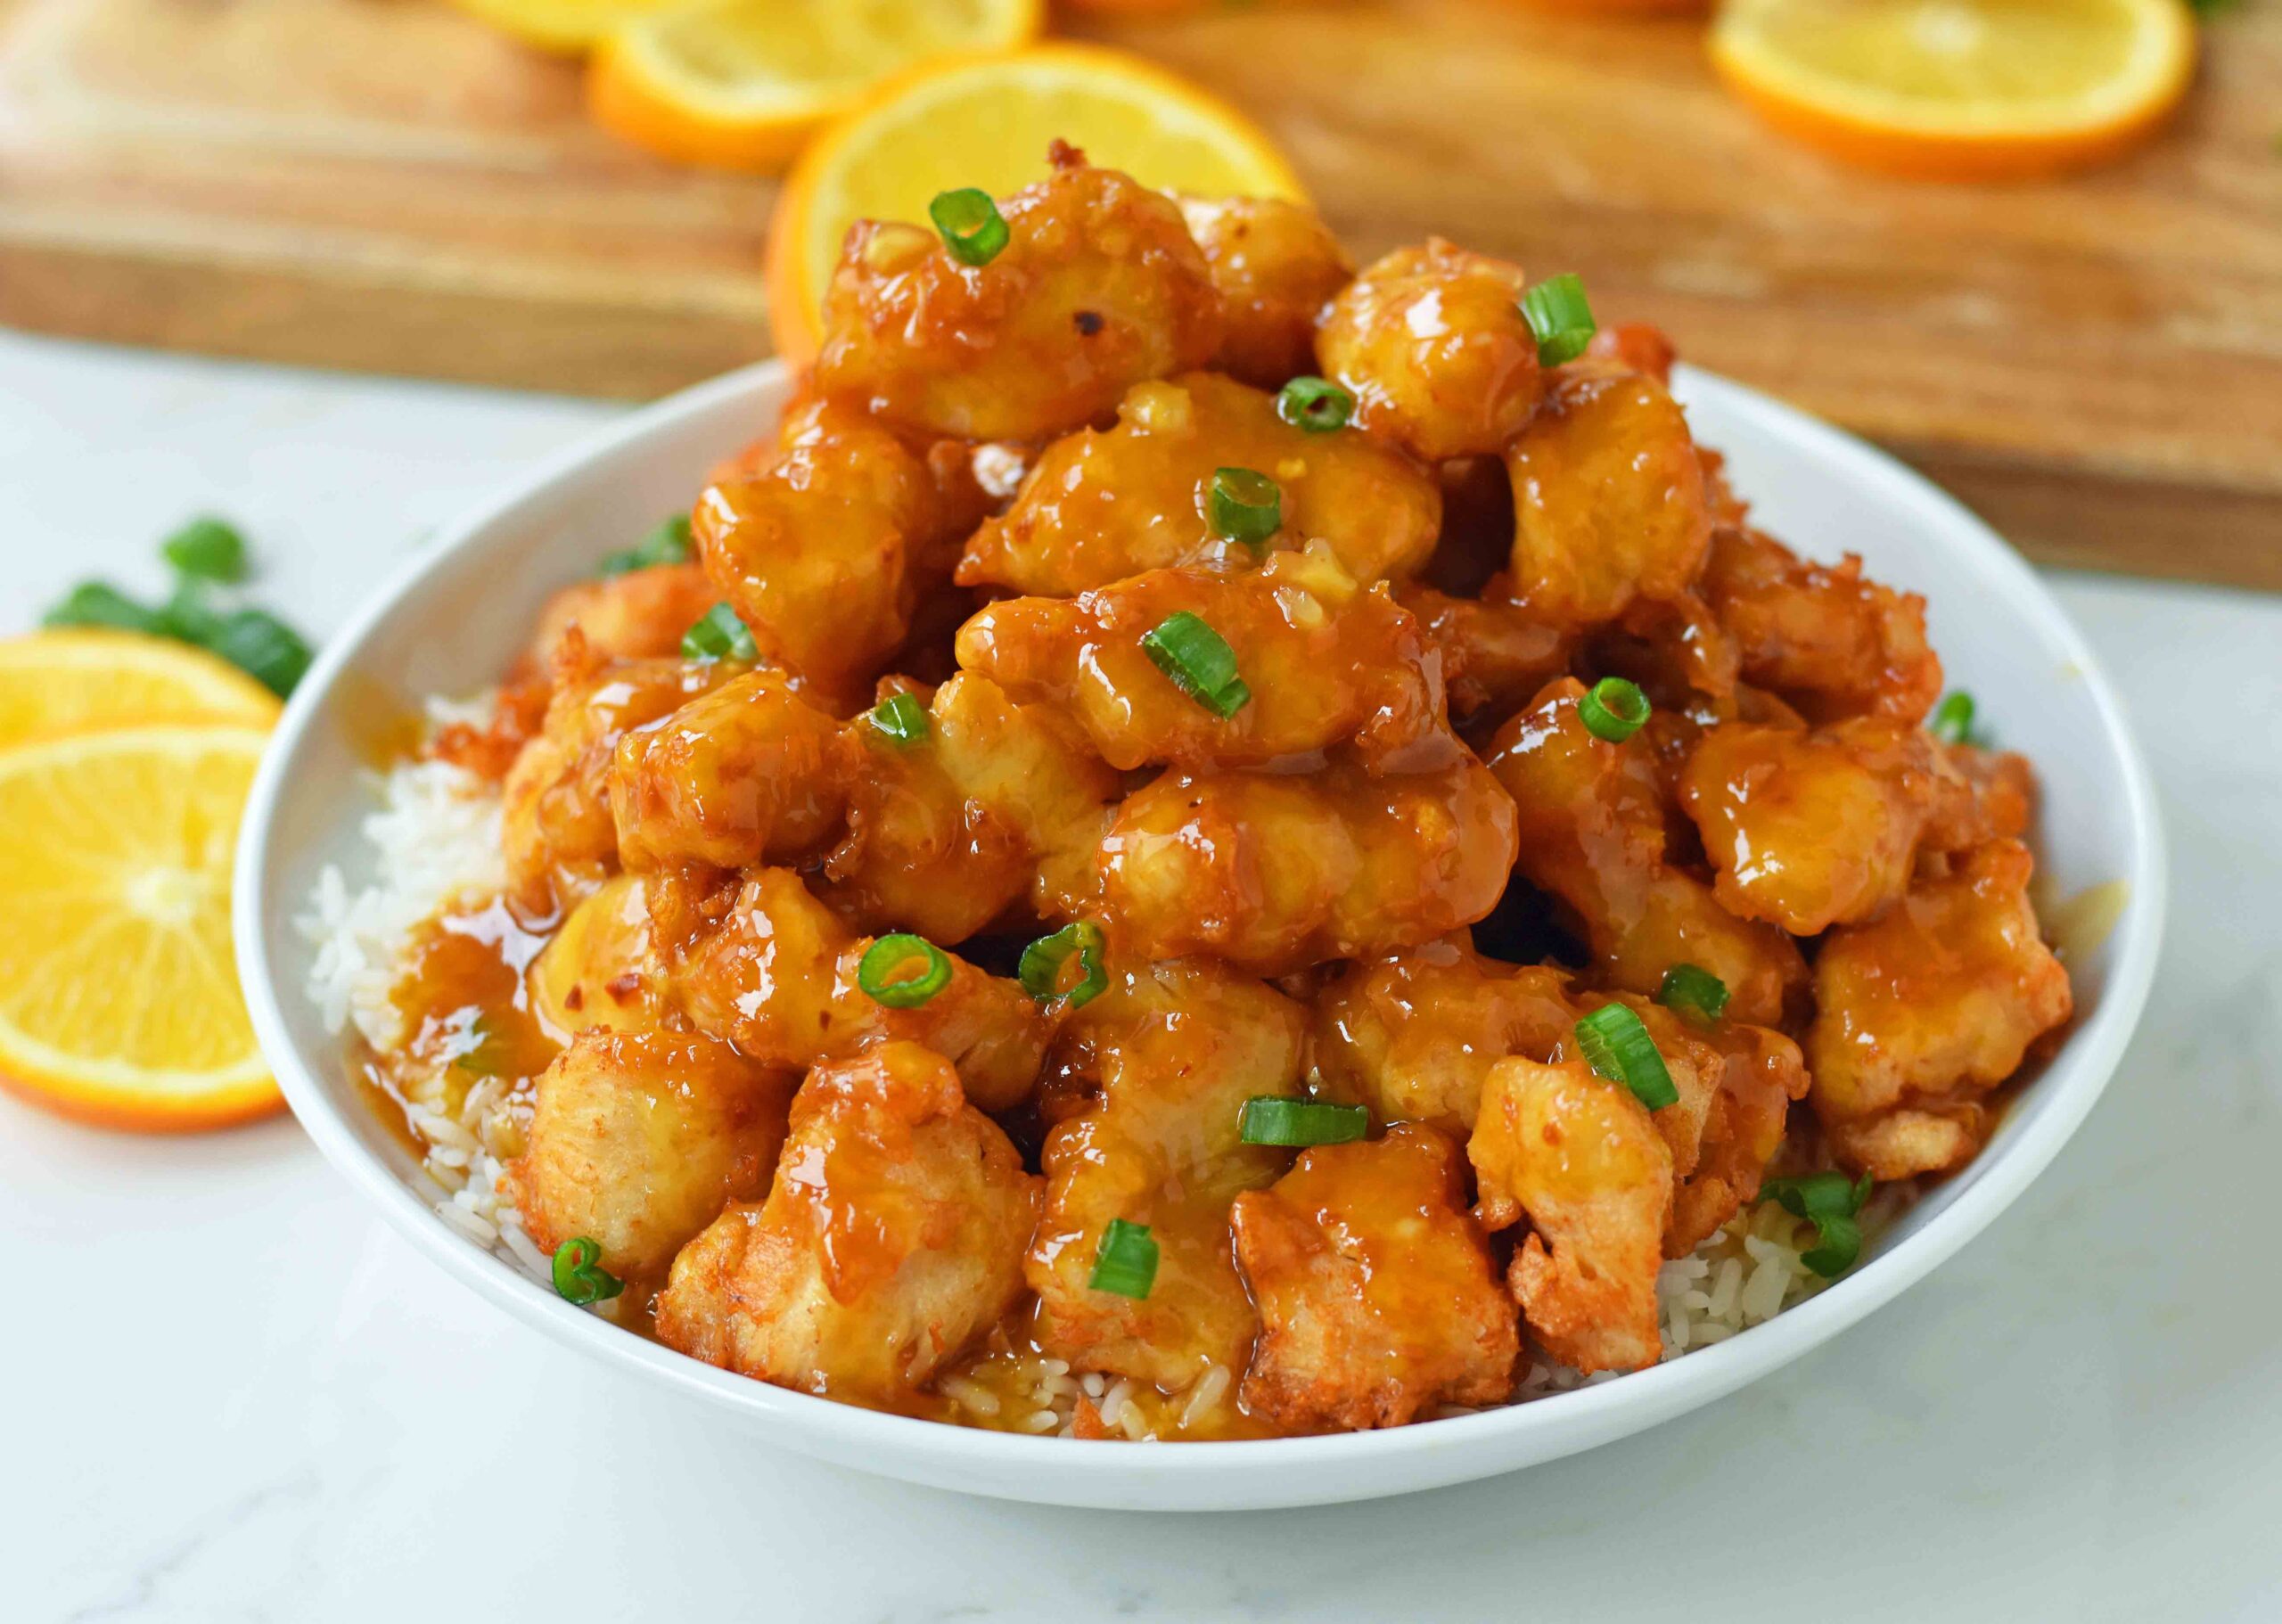
What if you could create a version at home that’s not just as good as takeout, but profoundly better? This recipe is your ticket there. Forget everything you know about lackluster, greasy imitation. We’re talking about tender, juicy pieces of chicken encased in a shatteringly crisp, golden-brown coating, glazed in a vibrant orange sauce that is the perfect harmony of fresh citrus zest, savory soy, a hint of ginger, and just the right amount of sweetness. This is orange chicken elevated—a dish that delivers on every textural and flavorful promise.

So, why will this become your new go-to recipe? Because it gives you complete control. You decide the quality of the chicken, the freshness of the oranges in your sauce, and the perfect level of spice. You can achieve that elusive crispy-on-the-outside, tender-on-the-inside texture that most restaurants struggle to preserve during delivery. Best of all, it demystifies the process, breaking it down into simple, foolproof steps that transform basic ingredients into an extraordinary culinary experience.

This isn’t just about saving a few dollars; it’s about the immense satisfaction of mastering a beloved classic and sharing a meal made with care. The journey to unforgettable orange chicken starts not with a delivery app, but right here in your own kitchen. Let’s begin by gathering the simple, fresh ingredients that will make it happen.
%fChicken Salad with Grapes %

Essential Ingredients for Your Homemade Orange Chicken 

Creating a truly exceptional orange chicken dish begins with understanding the role of each ingredient. This isn’t just a list—it’s your roadmap to building the complex, balanced flavors and textures that define this beloved dish. Using high-quality, fresh components will elevate your meal from a simple imitation to a restaurant-quality experience that might just make you forget about takeout for good. Let’s break down what you’ll need and why each ingredient matters.

For the Chicken and Marinade:

  • Chicken:
    1.5 lbs boneless, skinless chicken thighs or breasts, cut into 1-inch cubes. Thighs are highly recommended for their richer flavor and juiciness, but breasts work well for a leaner option.

  • Marinade Base:
    2 tablespoons soy sauce1 tablespoon rice wine (or dry sherry), and 1 teaspoon sesame oil. This combination tenderizes the chicken while layering in savory, umami depth.

  • Egg:
    1 large egg, lightly beaten. This helps the coating adhere to the chicken for that perfect crispiness.

For the Crispy Coating:

  • Cornstarch:
    ½ cup cornstarch. This is the secret to achieving an ultra-crispy, lightweight crust that doesn’t absorb excess oil.

  • All-Purpose Flour:
    ¼ cup all-purpose flour. Combined with cornstarch, it creates a sturdy yet delicate coating.

  • Seasonings:
    1 teaspoon garlic powder and ½ teaspoon white pepper to subtly enhance the chicken’s flavor.

For the Signature Orange Sauce:

  • Fresh Citrus:
    Zest and juice of 2 large oranges. Fresh juice is non-negotiable here—it provides the bright, vibrant base that bottled juice can’t match.

  • Aromatics:
    2 cloves garlic (minced) and 1 tablespoon fresh ginger (grated). These form the savory foundation of the sauce.

  • Liquid Flavor Builders:
    ⅓ cup soy sauce2 tablespoons rice vinegar (for tang), and 1 tablespoon sesame oil (for nutty depth).

  • Sweetness and Heat:
    ¼ cup honey or brown sugar (adjust to taste) and 1-2 teaspoons red pepper flakes (or Sriracha) for a customizable kick.

  • Thickening Agent:
    1 tablespoon cornstarch mixed with 2 tablespoons water. This slurry will give your sauce that glossy, clingy consistency.

For Cooking and Garnish:

  • Neutral Oil:
    1-2 cups peanut or vegetable oil for frying. A high smoke point ensures a crisp, non-greasy finish.

  • Garnishes:
    Sliced green onions and toasted sesame seeds for freshness, color, and a final flourish of texture.

Why These Ingredients Work Together:
Each component serves a purpose. The marinade tenderizes, the coating creates texture, and the sauce—bright, savory, sweet, and spicy—brings everything together. With this foundation, you’re equipped to create a dish that’s not just takeout-level, but truly exceptional. Now, let’s dive into the heart of the recipe: crafting that unforgettable orange sauce.

The Key to the Perfect Orange Chicken Sauce 

The soul of any exceptional orange chicken lies in its sauce—a harmonious blend of sweet, tangy, savory, and spicy notes that should cling luxuriously to each piece of crispy chicken without overwhelming it. Getting this sauce right is what separates a forgettable attempt from a truly memorable dish. While many recipes rely on bottled or overly sweet shortcuts, the path to extraordinary flavor is built on fresh, balanced ingredients and a thoughtful cooking process. Here’s how to create a sauce that will redefine what orange chicken can be.

Building Layers of Flavor:
A great sauce is more than the sum of its parts. It’s built in layers, and each ingredient plays a specific role:

  • The Citrus Foundation: Freshly squeezed orange juice and zest are non-negotiable. The juice provides tangy sweetness, while the zest delivers potent, aromatic citrus oils that bottled juice lacks. For even more complexity, consider adding a teaspoon of fresh lemon juice to make the orange flavor pop.

  • The Savory Depth: Soy sauce provides the essential umami backbone. For additional richness, a tablespoon of oyster sauce or hoisin sauce can be stirred in, adding a subtle complexity that balances the sweetness.

  • The Tangy Element: Rice vinegar introduces a clean, sharp acidity that cuts through the richness of the fried chicken and prevents the sauce from becoming cloying.

  • The Sweetness: Honey or brown sugar provides the necessary sweetness. Brown sugar will contribute a deeper, molasses-like note, while honey offers a floral sweetness. The amount can be adjusted to taste, but remember: the goal is balance, not dessert.

  • The Aromatic Base: Freshly minced garlic and grated ginger are sautéed briefly in the pan before the liquid ingredients are added. This crucial step, called “blooming,” unlocks their full potential and infuses the entire sauce with a fragrant, savory depth.

  • The Heat: Red pepper flakes or a splash of Sriracha deliver a gentle warmth that lingers pleasantly. The level of heat is fully customizable, making the sauce adaptable to any palate.

%fChicken Salad with Grapes %

Achieving the Perfect Consistency:
A sauce that is too thin will make the chicken soggy; one that is too thick will be gloppy and unappealing. The secret to a glossy, restaurant-quality sauce that clings perfectly is a cornstarch slurry. A slurry is simply a mixture of equal parts cornstarch and cold water whisked together until smooth. This is added to the simmering sauce off the heat, then returned to the heat and stirred until the sauce thickens beautifully and becomes translucent. Adding the slurry to a boiling sauce can cause clumping, so patience and low heat are key.

Pro Tip: Taste and Adjust!
Before you toss the sauce with the chicken, always taste it. Is it sweet enough? Does it need more tang? More heat? Adjust the balance with an extra splash of rice vinegar, a pinch of sugar, or more red pepper flakes until it sings on your palate. This final tweak ensures the sauce is perfectly tailored to you.

With your sauce perfected—bright, balanced, and velvety—you’re ready for the next critical step: cooking the chicken to golden, crispy perfection.

 Step-by-Step Guide: Preparing and Cooking the Chicken

The journey to perfect orange chicken hinges on the texture of the chicken itself. This step is where you transform simple chicken pieces into juicy, tender morsels encased in a phenomenally crispy, golden-brown coating. While the sauce provides the flavor, mastering the preparation and cooking of the chicken is what ensures an authentic restaurant-quality result. Follow this detailed guide to achieve that ideal contrast between a crunchy exterior and a succulent interior.

Step 1: Cutting and Marinating the Chicken
Start with 1.5 pounds of boneless, skinless chicken thighs or breasts. Thighs are highly recommended for their richer flavor and ability to stay moist during cooking, but breasts work well for a leaner option. Use a sharp knife to trim any excess fat and cut the chicken into uniform 1-inch pieces. Consistent size is critical—it ensures every piece cooks at the same rate, preventing some from being overcooked and dry while others are underdone.

Place the chicken pieces in a bowl and add the marinade: 2 tablespoons of soy sauce, 1 tablespoon of rice wine (or dry sherry), and 1 teaspoon of sesame oil. Gently toss until the chicken is evenly coated. Let it marinate for at least 15 minutes at room temperature (or up to an hour in the refrigerator). This step is not just about adding flavor; the soy sauce tenderizes the chicken, and the rice wine helps neutralize any gamey notes, resulting in a cleaner, more pronounced taste.

Step 2: Creating the Light, Crispy Coating
The coating is what gives orange chicken its signature texture. In a separate shallow bowl or plate, combine ½ cup of cornstarch, ¼ cup of all-purpose flour, 1 teaspoon of garlic powder, and ½ teaspoon of white pepper. Whisk these dry ingredients together until fully blended. The cornstarch is the star here, responsible for creating a crisp, delicate crust that fries up beautifully without becoming heavy or greasy.

After marinating, add 1 lightly beaten large egg directly to the chicken and mix well. The egg will act as the glue that helps the dry coating adhere. Then, dredge each piece of chicken in the cornstarch-flour mixture, pressing gently to ensure an even, clump-free coating on all sides. Shake off any excess powder and place the coated pieces on a wire rack or plate. Let them sit for 5-10 minutes before frying. This resting period allows the coating to fully hydrate and adhere, which prevents it from sloughing off in the oil.

Step 3: Frying to Golden-Brown Perfection
Choose a heavy-bottomed pot, Dutch oven, or wok for frying and add 1-2 inches of a neutral, high-smoke-point oil like peanut, canola, or vegetable oil. Heat the oil over medium-high heat until it reaches 350–375°F (175–190°C). Using a kitchen thermometer is highly recommended for accuracy. If you don’t have one, test the oil by dropping a small piece of the coating into it; if it sizzles vigorously and rises to the surface immediately, the oil is ready.

Working in batches to avoid overcrowding the pot, carefully add the chicken pieces using tongs or a slotted spoon. Overcrowding will cause the oil temperature to drop, resulting in greasy, soggy chicken. Fry each batch for 3-4 minutes, turning occasionally, until the coating is a uniform golden brown and the chicken is cooked through. The internal temperature should reach 165°F (74°C).

As each batch finishes, transfer the chicken to a wire rack set over a baking sheet. Do not place it on paper towels, as this can trap steam and make the bottom of the chicken soggy. The wire rack allows air to circulate, keeping the entire piece crispy.

Your chicken is now perfectly cooked—crispy, golden, and juicy. It’s ready to be tossed in your vibrant orange sauce. Let’s bring everything together in the final, glorious step.

 How to Achieve a Crispy Coating and Tender Bite 

The hallmark of extraordinary orange chicken is its textural contrast: a shatteringly crisp, golden-brown exterior that gives way to juicy, flavorful chicken inside. Achieving this perfect balance is a matter of technique, not guesswork. This section breaks down the science and steps behind creating that ideal crunch while ensuring every bite remains tender and never dry or greasy.

The Science Behind the Crisp:
Understanding why the coating works is the first step to mastering it. The combination of cornstarch and flour is deliberate. Cornstarch fries up lighter and crispier than flour alone and creates a delicate, almost glass-like crust. Flour provides structure and helps the coating brown beautifully. The addition of baking powder (even just ½ teaspoon) can introduce tiny air pockets, making the crust even lighter and craggier—a pro trick often used in tempura.

The Double-Fry Method (The Ultimate Secret for Maximum Crispness):
For an unbeatably crispy coating that stands up to the sauce, consider the double-fry method often used for Korean fried chicken.

  1. First Fry (The Cook-Through): Fry the chicken at a slightly lower temperature, around 325°F (163°C), for 3-4 minutes. This step gently cooks the chicken through without burning the coating.

  2. Rest: Remove the chicken and let it drain on a wire rack for a few minutes.

  3. Second Fry (The Crisp-Up): Increase the oil temperature to 375°F (190°C). Fry the chicken again in batches for just 60-90 seconds until deeply golden brown and incredibly crispy. This second, hotter fry removes any excess moisture from the coating and locks in the crisp texture.

Why a Wire Rack is Non-Negotiable:
As emphasized before, always drain fried chicken on a wire rack set over a sheet pan, not on paper towels. Paper towels trap heat and steam, causing the bottom of the chicken to become soft and soggy. A wire rack allows air to circulate around the entire piece, preserving its crispness on all sides until you’re ready to sauce it.

Ensuring a Juicy, Tender Interior:
A crispy coating is worthless if the chicken inside is dry.

  • Don’t Overcook: Use a thermometer! The second the internal temperature hits 165°F (74°C), remove the chicken from the oil. It will not get more done while draining.

  • The Right Cut: Using chicken thighs instead of breasts is the easiest insurance against dryness. Their higher fat content keeps them moist and forgiving even with a slightly longer fry time.

  • The Marinade Matters: The brief marinade in soy sauce and rice wine isn’t just for flavor; the salt and acidity help the chicken retain moisture during the high-heat cooking process.

Your chicken is now a masterpiece of texture—crispy, light, and perfectly cooked. It’s engineered to hold its own against the sauce. Now, let’s combine them with care to ensure that glorious crunch survives until it reaches the plate.

Combining Everything: Coating the Chicken in Sauce 

This is the moment of truth—the final, crucial step where your perfectly crispy chicken meets your vibrant, flavorful sauce. The goal here is to achieve a beautiful, even glaze without sacrificing the hard-won texture of the chicken. How you combine these two elements will determine whether your dish is a resounding success or a soggy disappointment. This process is about finesse, not force, ensuring every piece is luxuriously coated while retaining its essential crispness.

The Right Tools and Timing:
Before you begin, ensure everything is ready. You will need:

  • Your batch of freshly fried, still-hot chicken (warm chicken absorbs sauce better).

  • Your prepared orange sauce, kept warm over low heat. If it has thickened too much while sitting, whisk in a tablespoon of water or orange juice to loosen it.

  • large, wide bowl for tossing. This gives you plenty of room to maneuver.

  • flexible spatula or large spoon for gentle folding.

The Tossing Technique: The Gentle Fold
The key is to work quickly and gently. Pour the warm sauce over the hot chicken in the large bowl. Using your spatula, employ a folding motion—like you’re gently turning over soil—rather than a vigorous stirring or mashing motion. This technique ensures each piece gets coated evenly without breaking apart the delicate crispy coating.

Avoiding Sogginess: The “Just Enough” Principle
The biggest mistake at this stage is drowning the chicken in sauce. You want a glossy, complete coat, not a pool of liquid at the bottom of the bowl. It’s often better to start with about two-thirds of your sauce and toss. You can always add more, but you can’t take it away. The ideal result is each piece gleaming with sauce, with no excess sauce pooling.

Serve Immediately:
Orange chicken is at its absolute peak the moment it’s sauced. The contrast between the hot, crispy chicken and the glossy, flavorful sauce is what makes the dish magical. Plate it immediately and garnish. Any delay will cause the steam from the chicken to soften the coating.

Your culinary creation is now complete—a harmonious blend of texture and flavor. The final step is to present it with the perfect accompaniments that will turn this main dish into a memorable meal. Let’s explore the best ways to serve your masterpiece.

%fChicken Salad with Grapes %

The Best Sides for Orange Chicken 

A perfectly executed orange chicken deserves a supporting cast that complements its bold, sweet, and savory flavors without overshadowing them. The right side dishes balance the meal, adding contrasting textures, fresh elements, and hearty staples that turn your main dish into a well-rounded feast. Whether you’re aiming for a classic takeout-style experience or a more elevated homemade meal, these pairings will enhance every bite.

Classic Takeout-Style Pairings:
For those seeking the authentic restaurant experience at home, you can’t go wrong with these traditional favorites:

  • Steamed Jasmine or White Rice: This is the quintessential accompaniment. The fluffy, neutral grains of rice are the perfect canvas for soaking up the delicious extra sauce, ensuring none of that flavorful goodness goes to waste.

  • Fried Rice: Elevate your meal with a side of homemade vegetable fried rice. The savory, umami-rich flavors of the rice complement the orange chicken beautifully without competing with it.

  • Simple Stir-Fried Vegetables: A quick stir-fry of broccoli, snap peas, bell peppers, and carrots adds a necessary crisp-tender texture and a fresh, mild flavor that provides a pleasant contrast to the rich chicken.

Fresh and Crisp Options for Balance:
Cut through the richness of the dish with light, vibrant sides that add a refreshing crunch:

  • Asian-Inspired Cucumber Salad: Thinly sliced cucumbers tossed in a tangy dressing of rice vinegar, a touch of sugar, sesame oil, and red pepper flakes provide a cool, crisp, and slightly spicy counterpoint.

  • Light Cabbage Slaw: A simple slaw of shredded Napa or green cabbage, carrots, and cilantro with a rice vinegar-based dressing (instead of mayonnaise) adds a fantastic crunch and acidity without heaviness.

Hearty and Satisfying Additions:
For a more substantial meal that will satisfy a crowd, consider these heartier options:

  • Lo Mein Noodles: Soft, chewy lo mein noodles tossed lightly in sesame oil and soy sauce make for a delightful and filling base alongside the chicken.

  • Steamed or Roasted Broccoli: The slightly bitter, earthy flavor of broccoli is a classic and effective pairing that stands up well to the strong flavors of the sauce.

Garnishes: The Final Touch:
Never underestimate the power of the right garnish to add a final layer of flavor, color, and texture. Right before serving, sprinkle your plated orange chicken with:

  • Thinly Sliced Green Onions: For a pop of color and a mild, sharp bite.

  • Toasted Sesame Seeds: For a nutty flavor and a subtle crunch.

  • Fresh Orange Zest: For an extra burst of citrus aroma that reinforces the primary flavor.

With your orange chicken plated alongside the perfect sides and garnishes, your meal is ready to impress. Next, we’ll cover how to handle any leftovers to ensure your delicious creation can be enjoyed to the last bite.

Expert Tips for Make-Ahead and Storing Leftovers

A truly great recipe is one that fits seamlessly into your life, offering both spectacular freshness and convenient longevity. Knowing how to properly prepare components in advance and store leftovers is what transforms this orange chicken from a single meal into a versatile staple for your weekly routine. These strategies ensure that the incredible texture and flavor you worked so hard to create are preserved, giving you delicious options for days to come.

Make-Ahead Strategies for Effortless Meals:
The components of orange chicken are ideal for preparing ahead of time, making a seemingly complex dish surprisingly manageable on a busy weeknight.

  • The Sauce is Your Best Friend: The orange sauce can be made up to 5 days in advance. Simply prepare the sauce according to the recipe, let it cool completely, and store it in an airtight container in the refrigerator. When ready to use, gently reheat it in a saucepan over low heat, whisking in a splash of water or orange juice if it has thickened too much.

  • Marinate the Chicken: You can cut and marinate the chicken pieces up to 24 hours in advance. Store them in a sealed container or zip-top bag in the refrigerator. This not only saves time but allows the flavors to penetrate more deeply, resulting in even more tender and flavorful chicken.

  • Pre-Mix the Coating: The dry coating mixture of cornstarch, flour, and seasonings can be whisked together and stored in an airtight container at room temperature for several weeks, ready for your next craving.

Storing Leftovers Correctly:
Ideal orange chicken is enjoyed immediately, but if you have leftovers, proper storage is key to maintaining quality.

  1. Cool Completely: Allow the sauced orange chicken to cool to room temperature before storing. Do not leave it out for more than 2 hours to avoid bacterial growth.

  2. Airtight is Essential: Transfer the leftovers to a shallow, airtight container. Using a shallow container helps it cool faster and reheat more evenly later.

  3. Refrigerate Promptly: Store in the refrigerator for up to 3-4 days.

Reheating for Best Results:
Reheating is the trickiest part, as the goal is to revive the crispy texture without overcooking the chicken. The microwave is not your friend here—it will turn the coating soft and rubbery.

  • The Oven/Air Fryer Method (Highly Recommended):

    • Preheat your oven or air fryer to 375°F (190°C).

    • Spread the leftover orange chicken in a single layer on a baking sheet (for oven) or in the air fryer basket.

    • Reheat for 8-12 minutes in the oven, or 3-5 minutes in the air fryer, until hot and the coating has re-crisped. Watch it closely to prevent burning.

  • The Skillet Method:

    • Heat a non-stick skillet over medium heat. Add the leftovers and a tiny splash of water.

    • Cover and heat for a few minutes to warm through, then uncover and let cook for another minute or two to crisp up the exterior.

Can You Freeze Orange Chicken?
Yes, but with a caveat on texture. The sauce freezes well, but the crispy coating will soften.

  • To Freeze: Place cooled orange chicken in a freezer-safe container or heavy-duty freezer bag. Remove as much air as possible. It will keep for up to 2 months.

  • To Reheat from Frozen: Thaw overnight in the refrigerator. Then, reheat using the oven or air fryer method above to help restore as much crispness as possible.

By mastering these make-ahead and storage techniques, you ensure that your culinary effort extends far beyond a single meal, providing convenience and deliciousness whenever the craving strikes.

Answers to Common Orange Chicken Questions (FAQ)

Even with a meticulously crafted recipe, questions can pop up during the cooking process. This FAQ section is designed to be your trusted troubleshooting companion, addressing the most common pitfalls and curiosities to ensure your orange chicken turns out perfectly every time. Consider this your quick-reference guide to mastering the art of this beloved dish.

Q1: My chicken coating turned out soggy. What did I do wrong?
A: Sogginess is usually caused by one of three things:

  1. Oil Temperature Was Too Low: This is the most common culprit. If the oil isn’t hot enough, the chicken will absorb it instead of frying instantly. Always use a thermometer to maintain a temperature between 350–375°F (175–190°C).

  2. Overcrowding the Pot: Adding too much chicken at once causes the oil temperature to plummet. Fry in small, manageable batches.

  3. Saucing Too Early or Too Heavily: Always sauce the chicken immediately before serving. Letting it sit in the sauce or using too much sauce will quickly soften the crispy exterior.

Q2: Can I make this recipe without deep frying?
A: Yes, you can bake or air fry for a lighter option:

  • Baking: Place the coated chicken on a parchment-lined baking sheet. Lightly spray with oil and bake at 400°F (200°C) for 15-20 minutes, flipping halfway, until cooked through and crispy.

  • Air Frying: Arrange the coated chicken in a single layer in the air fryer basket. Lightly spray with oil and air fry at 375°F (190°C) for 10-12 minutes, shaking the basket halfway through.

  • Note: While these methods are healthier, they will not replicate the exact same ultra-crispy texture as deep frying.

Q3: My sauce is too thin/too thick. How can I fix it?
A: The consistency of your sauce is easily adjustable:

  • Too Thin: Create another small slurry with 1 teaspoon of cornstarch and 1 tablespoon of cold water. Whisk it into the simmering sauce and cook for another minute until it thickens.

  • Too Thick: Simply whisk in a small splash of water, orange juice, or chicken broth until it reaches your desired consistency.

Q4: How can I make my orange chicken spicier?
A: The heat level is easily customizable. Add more red pepper flakes to the sauce, include a teaspoon of sambal oelek or Sriracha, or add a finely minced fresh chili pepper (like a Thai bird’s eye chili) when you sauté the garlic and ginger.

Q5: Can I use bottled orange juice instead of fresh?
A: While fresh orange juice and zest are highly recommended for their bright, vibrant flavor, you can use bottled juice in a pinch. However, the flavor will be less complex and noticeably sweeter. You may want to reduce the amount of added sugar/honey in the recipe and add a teaspoon of lemon juice to mimic the freshness.

Q6: Is there a way to make this gluten-free?
A: Absolutely. This recipe is very adaptable:

  • Use tamari or a certified gluten-free soy sauce instead of regular soy sauce.

  • Ensure your cornstarch is certified gluten-free (it almost always is).

  • Use a gluten-free all-purpose flour blend in place of regular flour for the coating.

With these questions answered, you’re equipped to tackle this recipe with confidence, troubleshoot on the fly, and adapt it to your personal taste. You’re not just following a recipe—you’re mastering it.

 Your New Favorite Homemade Meal

You started this journey with a simple craving—a desire for that perfect combination of crispy, savory, and sweet that defines great orange chicken. But now, you’re leaving with so much more: the confidence to recreate a takeout classic in your own kitchen, the knowledge to control flavors and textures exactly to your liking, and the skills to turn everyday ingredients into something extraordinary. This isn’t just a recipe; it’s an invitation to take charge of your cooking and create meals that are not only delicious but deeply satisfying to make.

Think about what you’ve accomplished. You’ve learned how to marinate chicken for tenderness, create a coating that fries up impossibly crisp, and balance a sauce that’s vibrant and complex without being overly sweet. You’ve discovered how to pair it with sides that turn it into a feast and how to store and reheat leftovers like a pro. Most importantly, you’ve proven that you don’t need to rely on restaurants for this kind of flavor—you can make it yourself, anytime.

So the next time that craving hits, you know what to do. Skip the delivery app, head to your kitchen, and treat yourself to a meal that’s truly worth it. We hope this recipe becomes a trusted favorite in your home—one that brings everyone to the table with a smile.