You are currently viewing Easy Chicken with Red Peppers and Onions (One-Pan Recipe)

Easy Chicken with Red Peppers and Onions (One-Pan Recipe)

Introduction: A Simple, Flavorful Skillet Supper

In the hustle of a busy weeknight, the dream of a wholesome, delicious, and satisfying dinner can often feel out of reach. The temptation to order takeout or settle for something bland is real. But what if the solution was simpler than you thought? This recipe for Chicken with Red Peppers and Onions is here to transform your evening routine. It’s a vibrant, one-pan wonder that proves you don’t need a long list of ingredients or complicated techniques to get a truly fantastic meal on the table.

Imagine tender, juicy pieces of chicken, seared to golden perfection, nestled alongside sweet, caramelized red peppers and soft, savory onions. The colors alone—deep reds and golden browns—make it a feast for the eyes before it even hits your palate. The beauty of this dish lies in its elegant simplicity. It’s a classic combination of flavors that just works, relying on the natural sweetness of the peppers and the hearty depth of the onions to create a dish that feels both comforting and fresh.

This isn’t just another recipe; it’s your new weeknight champion. It comes together in about 30 minutes, uses just one pan for easy cleanup, and is incredibly versatile, fitting seamlessly into meal prep plans or impromptu dinners. Whether you serve it over a bed of fluffy rice, toss it with pasta, or stuff it into warm tortillas, this dish is a guaranteed crowd-pleaser that will have everyone asking for seconds.

So, let’s leave the complicated recipes and lengthy cleanup for another day. It’s time to create something simple, spectacular, and deeply satisfying. Grab your skillet, and let’s start by gathering a few fresh, key ingredients.
%fChicken Salad with Grapes %

Key Ingredients for a Vibrant and Easy Dish 

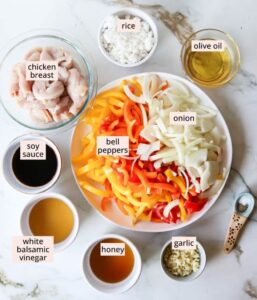
The magic of this recipe isn’t found in a long, complicated list of ingredients, but in the quality and harmony of a few simple components. Each element plays a specific role in building layers of flavor, texture, and visual appeal, transforming basic ingredients into a cohesive and impressive meal. Understanding the purpose of each item will help you make the best choices and substitutions, ensuring a delicious result every time.

The Core Components:

  • The Chicken:

    • What to Use: 1.5 pounds of boneless, skinless chicken breasts or thighs, cut into uniform 1-inch strips or cubes. Chicken thighs are highly recommended for their richer flavor and juiciness, as they remain more forgiving during cooking. Breasts are a excellent leaner option but require careful attention to avoid drying out.

    • Why It Works: The chicken serves as the hearty, protein-rich foundation of the dish. Cutting it into even pieces is crucial for consistent cooking, ensuring every bite is perfectly done at the same time.

  • The Vegetable Trio:

    • Red Bell Peppers (2 large): These are the star of the show, providing a vibrant color and a sweet, slightly smoky flavor that becomes even more pronounced when sautéed. Their firm texture holds up well to cooking, adding a pleasant bite.

    • Yellow or White Onion (1 large): Onions form the savory, aromatic base of the dish. As they cook, they caramelize and release natural sugars, offering a deep, sweet richness that balances the other flavors.

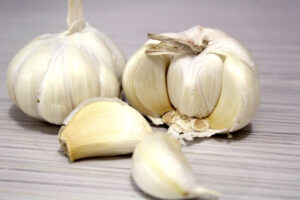
    • Garlic (2-3 cloves, minced): The flavor powerhouse. Added towards the end of sautéing to prevent burning, garlic delivers a pungent, aromatic kick that ties the chicken and vegetables together.

  • The Flavor Builders:

    • Cooking Oil (2 tablespoons): A neutral oil with a high smoke point, such as avocado oil, grapeseed oil, or light olive oil, is ideal for searing the chicken and sautéing the vegetables without burning.

    • Seasonings: Salt, black pepper, and paprika form the essential seasoning blend. Paprika (smoked or sweet) adds a subtle earthiness and a beautiful color to the chicken. Dried herbs like oregano or thyme (1 teaspoon) can add another layer of complexity.

    • Liquid for Deglazing (¼ cup): This is the secret to creating a simple, impactful pan sauce. Chicken broth, white wine, or even water works. It loosens the flavorful browned bits (the “fond”) left in the pan after searing the chicken, incorporating all that deliciousness into your sauce.

Why This Combination Works:
This trio of ingredients is a classic for a reason. The savory umami of the chicken, the sweet crunch of the peppers, and the aromatic depth of the onion and garlic create a perfectly balanced flavor profile. It’s a dish that feels complete yet is incredibly straightforward, allowing each component to shine. With your ingredients gathered, the next step is all in the preparation, setting you up for a seamless and quick cooking process.

Prepping Your Ingredients for Success

In a fast-paced recipe like this, a little preparation goes an incredibly long way. Taking a few minutes to properly prepare your ingredients before you even turn on the stove—a practice known as mise en place—is the single greatest guarantee of a smooth, enjoyable, and successful cooking experience. It transforms the process from a frantic race against burning garlic into a calm, restaurant-style execution where you are in complete control. This step ensures everything cooks evenly and allows you to focus on technique rather than scrambling to chop an onion while your chicken overcooks.

The Chicken: Trimming and Cutting for Even Cooking
Start with 1.5 pounds of boneless, skinless chicken thighs or breasts. If using thighs, trim away any excess fat. The most important task here is to cut the chicken into uniform, 1-inch pieces. Consistent size is non-negotiable; it ensures that every piece of chicken will finish cooking at the exact same time. Uneven pieces will result in some being perfectly juicy while others are dry and overcooked. Pat the chicken pieces thoroughly dry with a paper towel—this is a critical step for achieving a beautiful, golden-brown sear instead of steaming in the pan. Place the dried chicken in a bowl, toss it with 1 tablespoon of oil, 1 teaspoon of salt, ½ teaspoon of black pepper, and 1 teaspoon of paprika, and set it aside. This brief seasoning period allows the flavors to begin penetrating the meat.

The Vegetables: Consistent Sizing for Perfect Sautéing

  • Onion: Cut 1 large yellow or white onion in half through the root, peel it, and then slice it into ½-inch thick half-moons. This shape allows them to soften and caramelize beautifully.

  • Red Bell Peppers: Slice 2 large red bell peppers into uniform ¼ to ½-inch thick strips. Try to make them as even as possible so they cook at the same rate. Remove the core and seeds first.

  • Garlic: Mince 2-3 cloves of garlic finely so it disperses its flavor evenly throughout the dish. Keep it separate from the onions and peppers.
%fChicken Salad with Grapes %

The Final Mise en Place:
Before heating your pan, have everything within arm’s reach:

  1. Your bowl of seasoned, dry chicken pieces.

  2. Your sliced onions and peppers grouped together.

  3. Your minced garlic in a small dish.

  4. Your ¼ cup of chicken broth or white wine measured and ready.

  5. Any additional herbs or seasonings.

This organized approach eliminates stress and sets the stage for a flawless cooking sequence. With your ingredients prepped and your station set, you’re ready to fire up the stove and start building flavor in your skillet.

Step-by-Step: Cooking the Chicken to Perfection

The success of this entire dish hinges on how you cook the chicken. This step is where you build the foundational flavor and achieve the ideal texture—tender, juicy morsels with a beautifully golden, slightly crisp exterior. Rushing this process or using the wrong technique can lead to steamed, rubbery chicken, but by following these key principles, you’ll ensure a perfect result every time.

Step 1: Heating the Pan Properly
Place your large skillet (stainless steel or cast iron work best for searing) over medium-high heat and let it get properly hot for a minute. Add 1-2 tablespoons of a high-smoke point oil like avocado or grapeseed oil and swirl to coat the pan. The oil should shimmer and look fluid, but not smoke. A properly heated pan is crucial; it ensures the chicken immediately sizzles on contact, searing the surface and locking in the juices.

Step 2: Searing in Batches (The Golden Rule)
This is the most important tip for perfect chicken: DO NOT overcrowd the pan. Overcrowding causes the pan’s temperature to drop dramatically, which steams the chicken instead of searing it, resulting in a pale, rubbery texture.

  • Add only a single layer of chicken pieces to the hot oil, ensuring they aren’t touching each other. You will likely need to cook in 2-3 batches.

  • Resist the urge to move them immediately. Let them cook undisturbed for 2-3 minutes on the first side. This allows a deep, golden-brown crust to form.

Step 3: Achieving the Perfect Sear
After 2-3 minutes, use tongs to flip each piece. You should see a lovely, browned crust. Cook for another 2-3 minutes on the second side until the chicken is cooked through and golden brown on all edges.

  • How to Tell When It’s Done: The safest way is to use an instant-read thermometer. The internal temperature should reach 165°F (74°C). Alternatively, you can cut into one of the larger pieces; the juices should run clear, with no pink remaining.

  • Pro Tip: If your chicken is browning too quickly on the outside before it’s cooked through, simply reduce the heat to medium.

Step 4: Removing and Resting
Once each batch is perfectly cooked, transfer the chicken to a clean plate or a wire rack. Do not pile it high, as the residual heat will continue to cook the chicken (called “carryover cooking”). Letting it rest briefly at this stage ensures it stays juicy. Crucially, you must leave any browned bits and rendered fat in the pan—this “fond” is packed with flavor and will be the base for your vegetables and sauce.

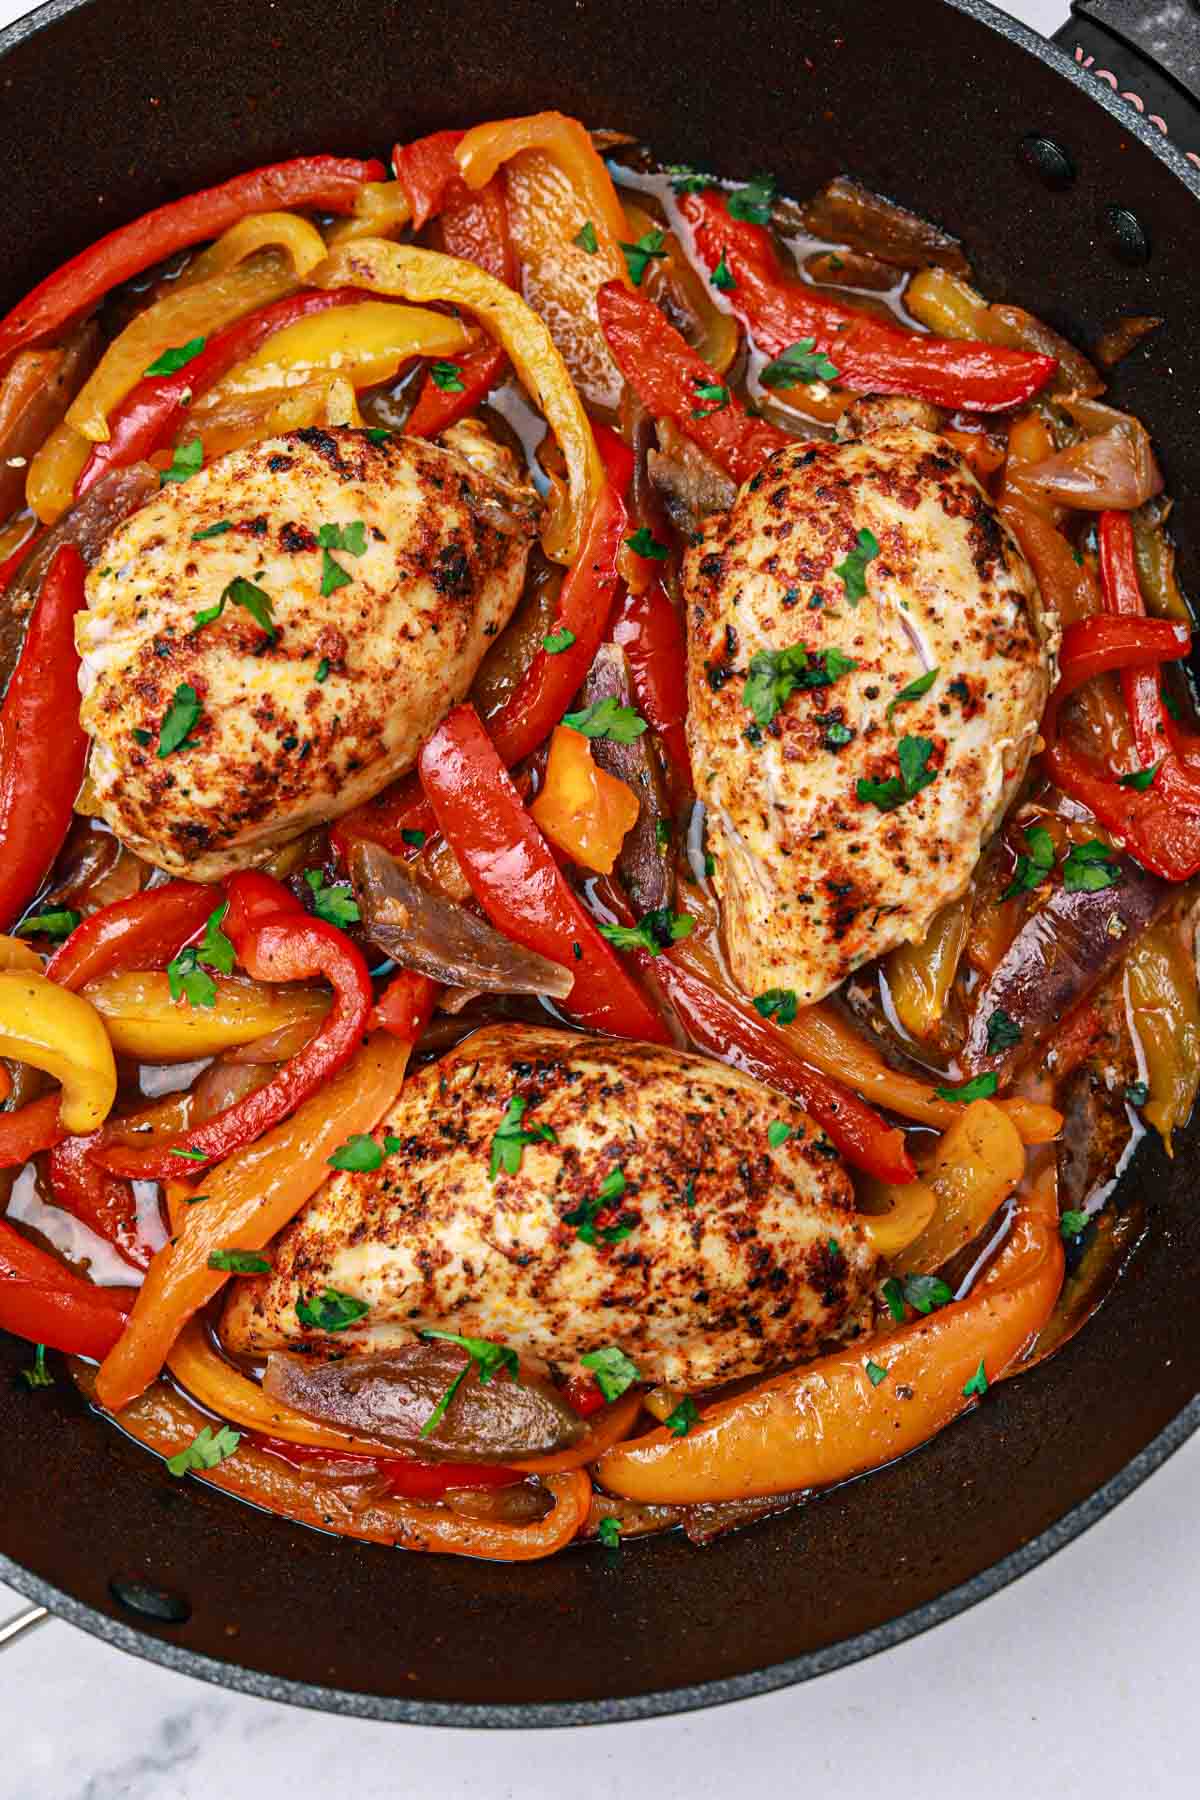
Your chicken is now perfectly cooked—juicy on the inside with a flavorful, seared exterior. It’s ready to be set aside while you use the same flavorful pan to transform your prepped vegetables into a sweet and savory masterpiece.

 Sautéing the Vegetables for Maximum Flavor

With your chicken resting, the stage is now set for the vegetables. This is where you build the aromatic foundation that will define the character of your entire dish. The goal is to transform your crisp, raw onions and peppers into tender, sweet, and deeply flavorful components by harnessing the power of the pan and the rich remnants left behind by the chicken. This process, known as sweating and caramelizing, is what turns simple ingredients into something extraordinary.

Using the Foundation of Flavor:
Do not clean the skillet! The browned bits stuck to the bottom (the fond) and the rendered fat from the chicken are treasure troves of flavor. If the pan seems dry, add another tablespoon of oil. Place the skillet back over medium heat. You’ll use this existing foundation to cook your vegetables, ensuring every bit of flavor is absorbed.

The Order of Operations:

  1. Sauté the Onions First: Add the sliced onions to the pan. Stir to coat them in the oil and pan drippings. Cook, stirring occasionally, for 4-5 minutes. You’ll notice the onions will become translucent and start to soften. This initial cooking allows their natural sugars to begin caramelizing, developing a sweet, savory depth.

  2. Add the Peppers: Once the onions have softened, add the sliced red bell peppers. Stir to combine everything. The higher water content of the peppers will cool the pan slightly, which is why we add them after the onions have a head start.

  3. Cook to Sweet, Tender Perfection: Continue to cook the onions and peppers together over medium heat for another 6-8 minutes, stirring occasionally. You are looking for the peppers to soften and become vibrant, and for the onions to turn a light golden brown and become fragrant. The goal is tender-crisp vegetables with a sweet, slightly charred flavor, not mushy or burnt.

The Garlic Rule: Add Last!
Garlic burns easily and becomes bitter. In the last 60 seconds of the vegetables’ cooking time, push them to the side and add the minced garlic to the center of the pan. Let it cook on the hot surface for just 30 seconds to 1 minute until it becomes incredibly fragrant. Then, quickly stir it into the onions and peppers to distribute the flavor evenly. This quick bloom unlocks the garlic’s aromatic potential without the risk of burning.

Your skillet should now be filled with beautifully softened, sweet onions and peppers, infused with the savory notes of garlic and the fond from the chicken. This flavorful vegetable base is now ready to welcome the chicken back into the pan and be brought together with a final, simple sauce.

Combining Everything and Building the Sauce

This is the moment of harmony, where your individually cooked components reunite to become a cohesive, saucy, and deeply flavorful dish. The goal here is not to drown the ingredients in a heavy sauce, but to create a light, glossy glaze that coats every piece of chicken, onion, and pepper, unifying them with a final layer of savory richness. This simple process, built on the foundation you’ve already created, takes the dish from great to exceptional.

Deglazing: Unlocking the Hidden Flavor
With your beautifully sautéed vegetables still in the skillet, it’s time to deglaze. This is the secret technique that professional chefs use to capture every last bit of flavor.

  • Increase the heat to medium-high.

  • Pour in your ¼ cup of liquid—whether it’s chicken broth, white wine, or even water. As the liquid hits the hot pan, it will instantly sizzle and steam.

  • Immediately, use a wooden spoon or spatula to scrape the bottom of the pan vigorously, loosening all the remaining browned bits (the fond) from both the chicken and vegetables. These bits are pure flavor. As you scrape, you’ll see the liquid darken and become infused with the essence of the entire cooking process.

Creating the Glaze:
Let the liquid simmer actively for 1-2 minutes. This allows it to reduce slightly, concentrating its flavor and thickening naturally. You’re not making a thick gravy; you’re creating a light, flavorful pan sauce. The starch from the onions will also help this sauce cling perfectly to the ingredients.

The Grand Reunion:
Now, return the cooked chicken and any accumulated juices on the plate back to the skillet with the vegetables and reduced sauce. Gently toss everything together until the chicken and vegetables are evenly coated in the glossy, savory glaze. Let it all heat through for just one final minute over medium heat. This allows the flavors to meld and ensures everything is piping hot.

Final Seasoning:
The last step is to taste and adjust. Does it need another pinch of salt? A crack of black pepper? A sprinkle of fresh herbs? This is your chance to perfect the seasoning to your personal preference.

Your one-pan masterpiece is now complete. The chicken is juicy and infused with the sweetness of the peppers and onions, while the vegetables are tender and savory. The light sauce brings it all together without overpowering the fresh, simple ingredients. It’s time to plate up and enjoy the fruits of your efficient labor.

Serving Suggestions: The Best Sides for Chicken, Peppers & Onions

The beauty of this perfectly cooked skillet dish is its incredible versatility. While it’s a complete meal on its own, the right side dishes can transform it from a simple supper into a well-rounded feast, adding contrasting textures, complementary flavors, and heft to satisfy every appetite. Whether you’re looking for a light, healthy option or a more comforting, hearty meal, these pairings are designed to elevate your main dish seamlessly.

Classic & Comforting Pairings:
For a traditional, satisfying experience that reminds you of a home-cooked classic, these sides are fail-proof:

%fChicken Salad with Grapes %

  • Fluffy White or Brown Rice: A simple bed of steamed rice is the ultimate neutral canvas. It soaks up the delicious pan juices and savory glaze from the chicken and vegetables, ensuring no flavor is left behind. For extra flavor, cook the rice in chicken broth instead of water.

  • Buttered Egg Noodles or Pasta: Tender egg noodles or your favorite short pasta (like penne or fusilli) tossed with a little butter or olive oil provide a soft, comforting base that complements the dish’s savory notes without competing.

  • Creamy Mashed Potatoes: For the ultimate comfort food plate, serve your chicken and pepper mixture over a generous scoop of creamy mashed potatoes. The combination of the juicy, saucy chicken with the smooth potatoes is incredibly satisfying.

Light & Fresh Options:
To keep the meal light and add a crisp, fresh contrast, consider these vibrant sides:

  • Simple Green Salad: A side salad with a sharp vinaigrette is the perfect counterbalance to the savory, rich skillet. Try mixed greens, sliced cucumber, and cherry tomatoes with a simple lemon-dijon vinaigrette. The acidity cuts through the richness and cleanses the palate.

  • Crusty Bread or Garlic Bread: A thick slice of crusty artisan bread or a warm piece of garlic bread is perfect for mopping up every last bit of sauce and glaze from your plate. It adds a satisfying crunch and is always a crowd-pleaser.

Low-Carb & Healthy Choices:
For those looking to keep the meal light on carbs or packed with nutrients, these options integrate beautifully:

  • Cauliflower Rice or Mash: An excellent low-carb alternative that provides a similar texture and sauce-soaking ability as traditional rice or potatoes without the carbs.

  • Steamed or Roasted Green Vegetables: Add an extra dose of green goodness with simply steamed broccoli, roasted asparagus, or sautéed zucchini. Their mild, sometimes slightly bitter flavor provides a perfect contrast to the sweet peppers and onions.

Garnishes: The Final Touch:
Never underestimate the power of a fresh garnish to add a burst of color and flavor right before serving. A sprinkle of freshly chopped parsley or chives adds a bright, herbal note that makes the entire dish look and taste more vibrant.

With your chosen sides, your simple skillet chicken is transformed into a complete, restaurant-quality meal. The final step is knowing how to enjoy any leftovers, ensuring your delicious creation provides convenience and flavor for another day.

: Tips for Customization and Dietary Tweaks

One of the greatest strengths of this recipe is its incredible flexibility. It serves as a perfect foundational template that you can easily adapt to suit your personal taste, what you have on hand, or specific dietary needs. Don’t be afraid to experiment and make it your own—these simple tweaks and swaps can create a completely new meal experience without any extra effort.

Protein Swaps:
The cooking method remains the same; just adjust cooking times slightly based on the protein’s thickness.

  • Beef: Use sliced sirloin, flank steak, or pre-cut stir-fry beef strips. Beef cooks quickly, so sear it in batches just until browned.

  • Pork: Pork tenderloin, cut into medallions or strips, is a fantastic, lean option.

  • Shrimp: Add large, raw shrimp (peeled and deveined) in the last 3-4 minutes of cooking the vegetables. They cook very quickly and will become opaque and pink when done.

  • Tofu (Firm or Extra-Firm): For a vegetarian option, press tofu to remove excess water, cube it, and pan-sear until golden brown on all sides before proceeding with the vegetable step.

Vegetable Variations:
The onion and pepper base is classic, but feel free to add or substitute with other vegetables. Just be mindful of cooking times—add harder veggies sooner and softer ones later.

  • Add with the Onions: Sliced mushrooms, chopped broccoli florets, or sliced carrots.

  • Add with the Peppers: Zucchini or yellow squash halves, asparagus cuts, or snap peas.

  • Add at the Very End (Last 1-2 minutes): Baby spinach or kale, which will quickly wilt in the heat.

Sauce and Flavor Twists:
Change the deglazing liquid and seasonings to take the dish in a whole new direction.

  • Italian Herb: Use dried oregano and basil. Deglaze with a splash of red wine vinegar and add a tablespoon of tomato paste with the garlic.

  • Asian-Inspired: Swap paprika for a teaspoon of grated ginger. Deglaze with soy sauce (or tamari) and a splash of rice vinegar. A drizzle of sesame oil at the end is a great finish.

  • Creamy Version: After deglazing, stir in a ¼ cup of heavy cream, half-and-half, or coconut milk and let it simmer for a minute to create a rich, creamy sauce.

Dietary Adaptations:

  • Gluten-Free: The recipe is naturally gluten-free. Simply ensure that any broth, pre-made spice blends, or soy sauce (if using) are certified gluten-free. Use tamari instead of regular soy sauce for an Asian twist.

  • Dairy-Free: The base recipe contains no dairy. For a creamy version, use a dairy-free alternative like coconut milk or unsweetened oat milk.

  • Lower Sodium: Use low-sodium chicken broth and limit added salt, relying more on herbs, spices, and acid (like a squeeze of lemon juice at the end) for flavor.

By viewing this recipe as a starting point, you unlock endless possibilities for quick, healthy, and delicious meals that will never feel boring. Next, we’ll cover how to properly store and reheat your creation to enjoy it all over again.

Storing and Reheating Your Leftovers

A great skillet meal is a gift that keeps on giving. With proper storage and reheating techniques, you can enjoy your chicken, peppers, and onions for a second—and equally delicious—meal. The key is to preserve the texture of the vegetables and the tenderness of the chicken, ensuring your leftovers taste just as good as the first time around. Follow these simple steps to maximize flavor and quality.

Cooling Down Safely:
Before storing, it’s crucial to cool the food quickly and safely to prevent bacterial growth.

  • Do not leave the cooked dish at room temperature for more than two hours.

  • To speed up the process, spread the leftovers in a single layer on a wide, shallow dish or baking sheet before transferring them to storage containers. This allows heat to dissipate much faster than if it were piled high in a deep container.

Best Storage Practices:

  • Airtight is Essential: Once cooled, transfer the leftovers to a shallow, airtight container. Using a shallow container helps the food cool evenly and reheat more consistently later.

  • Refrigerator: Store in the refrigerator for up to 3–4 days.

  • Freezer: This dish freezes reasonably well for up to 2 months. Place cooled leftovers in a freezer-safe bag or container, removing as much air as possible. Note that the texture of the peppers may become slightly softer upon thawing.

Reheating for Best Results:
The goal is to warm the food through without overcooking the chicken or turning the vegetables to mush. Avoid the microwave if possible, as it can make the chicken rubbery and the vegetables soggy.

  • Skillet Method (Recommended): Reheat leftovers in a skillet or non-stick pan over medium heat. Add a teaspoon of oil or a tablespoon of water or broth to the pan to create steam and prevent sticking. Gently heat, stirring occasionally, until thoroughly warmed through. This method helps restore some of the original texture.

  • Oven Method: For larger portions, preheat the oven to 350°F (175°C). Place the leftovers in an oven-safe dish, sprinkle with a tablespoon of water or broth, and cover with foil. Heat for 15-20 minutes, or until hot.

  • From Frozen: Thaw overnight in the refrigerator before reheating using one of the methods above.

By following these simple steps, you can ensure your flavorful skillet creation provides a convenient and tasty meal with minimal effort on another busy day.

Final Thoughts: Your New Go-To Weeknight Meal

You started with a simple combination of chicken, red peppers, and onions—ingredients you might already have in your kitchen. Now, you have a reliable, flavorful, and versatile recipe that proves a fantastic dinner doesn’t require complicated techniques or hard-to-find ingredients. This dish is more than just a meal; it’s a template for effortless, satisfying cooking that fits seamlessly into your busy life.

Remember why this recipe works: it’s fast, coming together in around 30 minutes. It’s easy, using just one pan for minimal cleanup. And it’s adaptable, welcoming your own creative twists with different proteins, vegetables, and flavors. Whether you stick to the classic version or make it your own, you’re equipped to create a wholesome dinner that feels both familiar and exciting.

So the next time you’re wondering what to make for dinner, remember this skillet. It’s your secret to a stress-free, delicious meal that will become a trusted favorite in your home.

Frequently Asked Questions (FAQ)

Q1: Can I use frozen peppers and onions?
A: Yes, you can. There’s no need to thaw them first. Add them directly to the hot skillet, but be aware that they will release more water as they cook. You may need to increase the sauté time by a few minutes to allow that liquid to evaporate and for the vegetables to brown properly.

Q2: My chicken is sticking to the pan. What did I do wrong?
A: Sticking usually means the pan wasn’t hot enough before adding the chicken or the chicken wasn’t patted dry. Ensure your skillet is properly preheated over medium-high heat and that you’ve thoroughly dried the chicken pieces with a paper towel before seasoning and adding them to the oil.

Q3: Can I make this in an air fryer?
A: Absolutely. Toss the seasoned chicken and vegetables in a little oil. Cook in the air fryer basket at 375°F (190°C) for 12-15 minutes, shaking the basket halfway through, until the chicken is cooked through and the vegetables are tender.

Q4: Is this recipe gluten-free and dairy-free?
A: Yes, the basic recipe is naturally both gluten-free and dairy-free. Always double-check that any packaged broth or spices you use are certified gluten-free if you have a severe allergy or sensitivity.

Q5: How can I make more sauce?
A: To create more pan sauce, simply increase the deglazing liquid (chicken broth or wine) to ½ cup. After scraping the browned bits, let it simmer and reduce for a minute longer. For a thicker sauce, mix 1 teaspoon of cornstarch with 1 tablespoon of cold water and whisk it into the simmering liquid until it thickens.


Nutrition Facts (Estimated)

  • Serving Size: ¼ of the recipe (approx. 1.5 cups)

  • Recipe Yields: 4 servings

  • Note: Nutrition is estimated based on using chicken breasts, 2 tbsp of olive oil, and low-sodium chicken broth. Values will vary with ingredients and portion sizes.

Nutrient Amount % Daily Value*
Calories ~320
Total Fat 16g 21%
Saturated Fat 2.5g 13%
Cholesterol 95mg 32%
Sodium ~450mg 20%
Total Carbohydrate 10g 4%
Dietary Fiber 2g 7%
Sugars 6g
Protein 35g 70%
Vitamin D 0mcg 0%
Calcium 35mg 2%
Iron 1.5mg 8%
Potassium 650mg 14%

Percent Daily Values are based on a 2,000 calorie diet. Your daily values may be higher or lower depending on your calorie needs.

Key Nutritional Highlights:

  • High in Protein: This meal provides a excellent source of lean protein, essential for muscle repair and keeping you feeling full and satisfied.

  • Rich in Vitamin C: Thanks to the red peppers, this dish is packed with Vitamin C, which supports immune function and skin health.

  • Source of Fiber: The vegetables contribute dietary fiber, which aids in digestion.

  • Customizable: The fat and sodium content can easily be lowered by using less oil and opting for low-sodium broth.