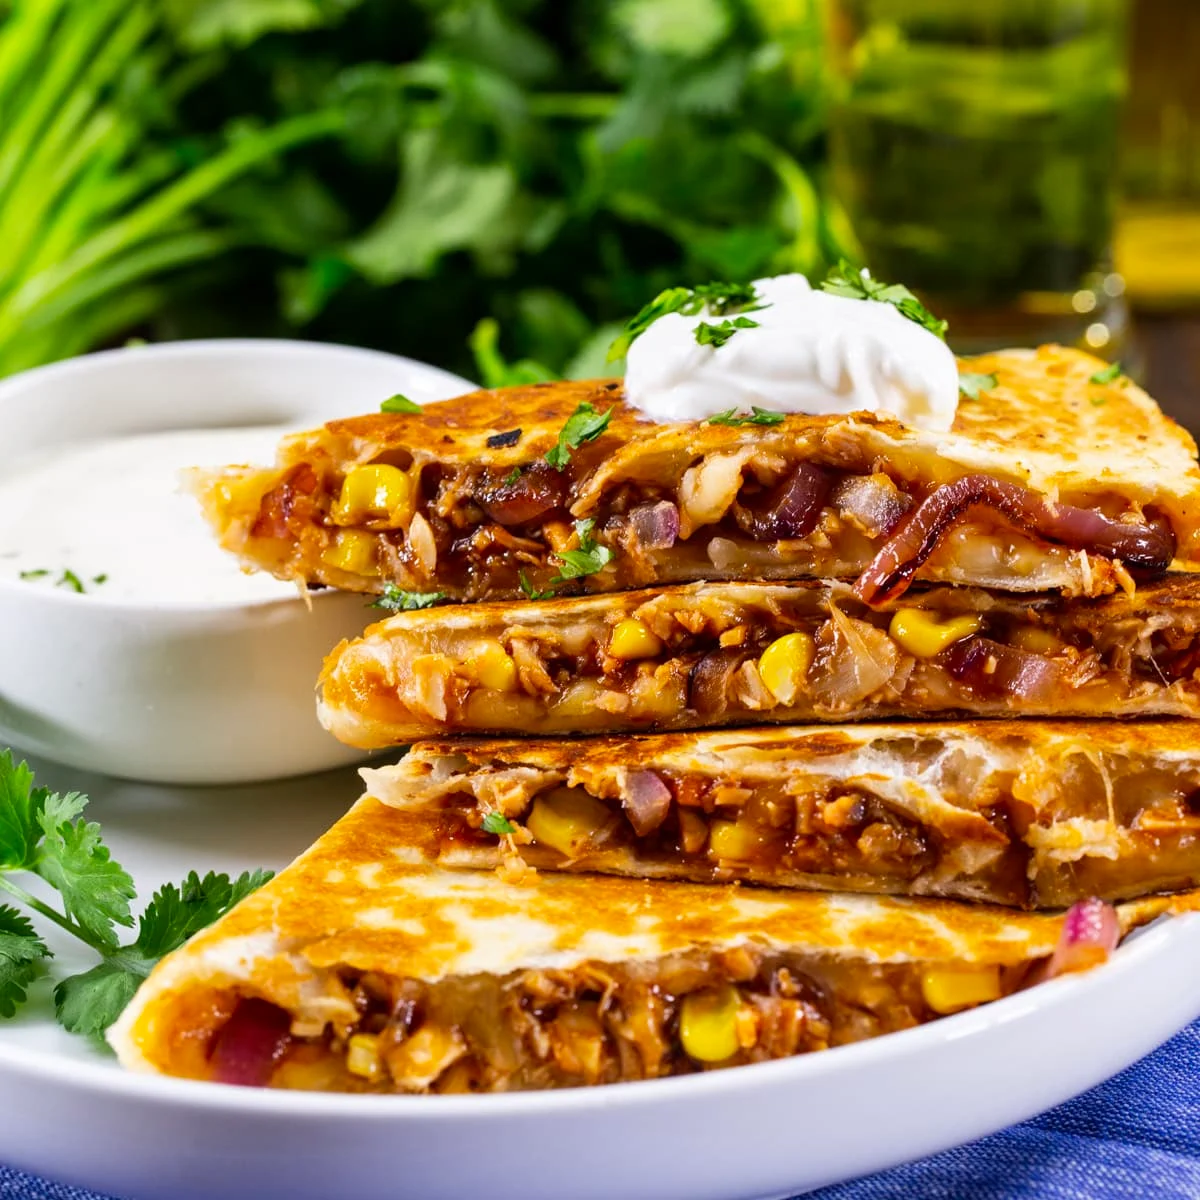
Your New Favorite Quick & Easy Meal
Imagine this: it’s been a long day. You’re hungry, everyone is asking what’s for dinner, and the thought of a complicated recipe or a big cleanup feels exhausting. You need something that feels like a treat—something delicious, satisfying, and fun to eat—but that comes together with minimal effort. This is where the Barbecue Chicken Quesadilla makes its grand entrance.
This isn’t just another recipe; it’s your secret weapon for turning simple ingredients into a meal that feels exciting. It takes the beloved, smoky sweetness of barbecue chicken and marries it with the gooey, crispy perfection of a toasted tortilla. The result? A handheld masterpiece that is irresistibly good, universally loved by both kids and adults, and—most importantly—ready in mere minutes.
Forget the notion that great flavor requires hours in the kitchen. This recipe is all about smart shortcuts and big impact. Whether you’re using leftover rotisserie chicken, pre-made BBQ sauce, or whipping it up from scratch, the path to a fantastic dinner has never been simpler or more delicious.
So, let’s ditch the stress and embrace the ease. Get ready to create a meal that’s perfect for a busy weeknight, a casual game-day gathering, or even a quick and satisfying lunch. Your journey to a crispy, cheesy, and utterly delicious solution starts right now. First up, let’s gather the simple ingredients that make it all possible.

The Simple Ingredients for Smoky, Cheesy Goodness
The magic of a great BBQ Chicken Quesadilla lies in its simplicity. You don’t need a long list of gourmet items to achieve maximum flavor. Instead, it’s about choosing a few key components that work in harmony to create the perfect balance of smoky, sweet, tangy, and creamy in every bite. This recipe is incredibly adaptable, built on a foundation of easy-to-find ingredients that you can customize based on what you have on hand.
The Core Components:
-
The Chicken:
-
The Best Base: You’ll need 2 cups of cooked, shredded chicken. This is the perfect opportunity to use up leftovers! Rotisserie chicken is the ultimate shortcut, offering fantastic flavor with zero effort. Alternatively, you can quickly poach or bake 2 boneless, skinless chicken breasts and shred them yourself.
-
-
The Sauce:
-
The Flavor Star: ½ to ⅔ cup of your favorite barbecue sauce is essential. The type you choose will define the character of your quesadilla—whether it’s sweet, spicy, smoky, or tangy. Feel free to experiment with different brands or a homemade version.
-
-
The Cheese (The Glue):
-
The Perfect Blend: Cheese is crucial for both flavor and that iconic “quesadilla melt.” A combination of 1 ½ cups of shredded Monterey Jack (for its excellent meltability) and ½ cup of shredded sharp cheddar (for a tangy punch) is ideal. As always, shredding your own cheese from a block will result in a far smoother melt than pre-shredded bags.
-
-
The Tortillas:
-
The Vessel: 4 large (10-inch) flour tortillas are recommended. Their soft, pliable nature and neutral flavor make them the perfect canvas. For a crispier result, you can use burrito-size tortillas.
-
-
The Aromatics & Add-Ins (Optional but Recommended):
-
For Flavor & Crunch: ¼ cup of finely diced red onion or sliced green onions add a sharp, fresh bite. ½ cup of canned black beans (rinsed and drained) and ½ cup of corn kernels (canned, frozen, or roasted) add heartiness and texture.
-
For Heat: 1-2 diced jalapeños (seeds removed for less heat) or a pinch of chili powder can add a welcome kick.
-
Why This Combination Works:
Each ingredient has a purpose. The shredded chicken provides hearty, protein-rich substance. The barbecue sauce delivers the signature smoky-sweet flavor. The cheese binds everything together with creamy, salty goodness. The tortilla becomes golden and crispy, holding it all together. Any add-ins introduce pops of texture and freshness, making each bite interesting.
With your simple ingredients gathered, you’re ready to move on to the next step: bringing them all together to create the flavorful filling.
Preparing Your Chicken: Shredded, Grilled, or Shortcut
The heart of your quesadilla is, unsurprisingly, the chicken. How you prepare it will set the stage for the entire dish’s texture and depth of flavor. The best part? This recipe is incredibly forgiving and offers multiple paths to a delicious result, whether you’re starting from scratch, using leftovers, or taking a brilliant shortcut. The goal is tender, flavorful chicken that will meld perfectly with the barbecue sauce and cheese.
The Brilliant Shortcut: Rotisserie Chicken
For the ultimate in speed and ease, pre-cooked rotisserie chicken is your best friend. It’s a total game-changer.
-
Method: Simply remove the skin and shred the meat from the bones using two forks. One rotisserie chicken will yield more than enough for this recipe.
-
Why It Works: It’s instantly ready, consistently moist, and already seasoned, adding an extra layer of flavor. This is the #1 choice for getting dinner on the table in under 20 minutes.
The Simple Stovetop: Poaching
If you’re starting with raw chicken, poaching is a foolproof method to ensure it stays juicy and is easy to shred.
-
Method: Place 2 boneless, skinless chicken breasts in a skillet. Cover them with water or chicken broth by about an inch. Bring to a gentle boil, then reduce heat to low, cover, and simmer for 12-15 minutes, until the internal temperature reaches 165°F (74°C).
-
Pro Tip: Let the chicken cool slightly in the cooking liquid before shredding. This helps it retain moisture. Shred it using two forks or a stand mixer with the paddle attachment for lightning-fast results.
The Flavor-Boosting Method: Grilling or Pan-Searing
For chicken with a richer, slightly smoky flavor, cooking it with a sear is the way to go.
-
Method: Season chicken breasts with salt, pepper, and a pinch of paprika or garlic powder. Grill over medium heat or pan-sear in a skillet with a little oil for 6-7 minutes per side, until cooked through. Let it rest for 5 minutes before slicing or shredding.
-
Why It Works: The Maillard reaction (browning) from grilling or searing adds complex, savory notes that complement the barbecue sauce beautifully.
Seasoning and Saucing:
Once your chicken is shredded, regardless of the method, the next step is crucial. In a bowl, combine the warm, shredded chicken with ½ to ⅔ cup of barbecue sauce. Mix until every strand is evenly coated. The warm chicken will absorb the sauce more readily, making it incredibly flavorful.
Your chicken is now prepped—succulent, saucy, and ready to become the star of your quesadilla filling. Next, we’ll combine it with other ingredients to build a truly unforgettable flavor and texture profile.
Crafting the Perfect Flavorful Filling
The filling is where your BBQ chicken quesadilla transforms from good to extraordinary. This step is about building layers of texture and flavor that will surprise and delight with every single bite. It’s not just about mixing chicken and sauce; it’s about creating a cohesive, well-balanced mixture that melts together perfectly inside the tortilla, ensuring no single ingredient overpowers another.
The Foundation: Saucy Chicken
Begin with your 2 cups of warm, shredded chicken thoroughly coated in ½ to ⅔ cup of barbecue sauce. The warmth of the chicken helps it absorb the sauce, making it deeply flavorful and moist. This saucy base is the cornerstone of your filling.
The Cheese Strategy: Distribution is Key
Cheese isn’t just a topping; it’s the glue that holds everything together and ensures every bite is stretchy and satisfying.
-
The Blend: Use a combination of cheeses. 1 ½ cups of shredded Monterey Jack will provide that perfect, smooth melt, while ½ cup of shredded sharp cheddar adds a tangy depth that cuts through the sweetness of the BBQ sauce.
-
The Method: Do not mix all the cheese into the chicken mixture. Instead, reserve about 1 cup of the cheese blend to create a separate cheesy layer. This dual approach guarantees maximum melt coverage and prevents the filling from becoming a gluey, homogenous mass.
The Flavor and Texture Boosters (The “Add-Ins”):
This is where you can get creative and customize your quesadilla to your taste. These additions introduce fresh flavors and contrasting textures that elevate the filling beyond simple chicken and cheese.
-
For Freshness and Crunch: Fold in ¼ cup of finely diced red onion or sliced scallions. Their sharp, pungent bite provides a refreshing contrast to the rich, smoky chicken.
-
For Heartiness: Add ½ cup of rinsed and drained black beans and ½ cup of corn kernels (canned, frozen/thawed, or roasted). These add substance, a slight sweetness, and a pleasant pop of texture.
-
For Heat: Incorporate 1-2 tablespoons of finely diced jalapeño (seeds removed for less heat) or a dash of chipotle powder for a smoky kick.
The Final Mix:
Gently combine the saucy chicken with your chosen add-ins (onions, beans, corn, etc.). Be careful not to overmix. You now have your flavorful filling ready to go.
Pro Tip: Avoid Sogginess
If your filling seems overly wet from the BBQ sauce or add-ins like corn, blot the mixture lightly with a paper towel or add a tablespoon of your reserved shredded cheese to help bind any excess moisture.
Your filling is now a perfectly balanced masterpiece—saucy, smoky, a little crunchy, and packed with flavor. It’s ready to be expertly assembled and cooked to golden, cheesy perfection.
Step-by-Step: Assembling the Ultimate Quesadilla
Assembly is a crucial step that determines the structural integrity and even distribution of flavors in your final quesadilla. A poorly assembled one can lead to filling spillage, uneven cooking, or bland bites. By following this methodical approach, you’ll ensure every wedge is packed with the perfect ratio of crispy tortilla, melted cheese, and flavorful filling.
The Setup: Your Assembly Station
Before you begin, have all your components within easy reach:
-
4 large (10-inch) flour tortillas
-
Your bowl of flavorful BBQ chicken filling
-
Your reserved 1 cup of shredded cheese blend
-
A small bowl of oil or melted butter and a pastry brush
-
A clean cutting board or work surface
The Layering Technique: The Half-Moon Method
This is the most reliable method for a perfectly cooked, easy-to-flip quesadilla.
-
Lay the Base: Place one tortilla flat on your work surface.
-
The Cheese Barrier: Sprinkle a thin layer of the reserved shredded cheese (about ¼ cup) over one half of the tortilla only, leaving a ½-inch border around the edge. This initial cheese layer will melt and act as a “glue,” sealing the bottom and preventing the filling from making the tortilla soggy.
-
Add the Filling: Spoon a generous, even layer of the BBQ chicken filling (about ¾ cup) over the cheese. Press it down gently to ensure it’s even, but avoid overfilling or spreading it too close to the edge, as this will cause spillage during cooking.
-
The Cheese Blanket: Top the filling with another ¼ cup of the reserved cheese. This top layer will melt and bind the filling to the top tortilla.
-
Fold and Seal: Carefully fold the bare half of the tortilla over the filled half, creating a perfect half-moon shape. Press down gently.
Preparing for the Pan:
-
Lightly brush the top surface of the folded quesadilla with a thin layer of oil or melted butter. This will promote a golden, crispy exterior.
-
Pro Tip: You can assemble all your quesadillas at once before cooking. Just place them on a baking sheet without overlapping.
Why This Method Works:
-
Prevents Sogginess: The cheese layers on the top and bottom protect the tortilla from moisture in the filling.
-
Ensures Even Melting: The filling is encased in cheese, which melts evenly and holds everything together.
-
Easy to Flip: The half-moon shape is far more stable and easier to manage in a skillet than a full, heavy, two-tortilla circle.
Your quesadillas are now expertly assembled—neat, even, and ready for cooking. The final step is to apply heat and transform them into the crispy, melty, golden-brown perfection we’ve been waiting for.
Cooking Methods: Stovetop, Oven, or Air Fryer
The final transformation of your quesadilla from assembled ingredients to crispy, golden, melted perfection happens here. The cooking method you choose will impact the texture, hands-on time, and ease of serving. Whether you’re cooking for one or for a crowd, there’s a perfect technique to achieve that ideal contrast between a crunchy exterior and a hot, gooey interior.
The Classic Stovetop Method (Best for 1-2 Quesadillas)
This is the traditional method that gives you the most control and the crispiest result.
-
Heat the Pan: Place a large, heavy-bottomed skillet (cast iron or non-stick work best) over medium-low heat. Proper temperature is key; too hot and the tortilla will burn before the cheese melts.
-
Cook: Gently place the assembled quesadilla in the dry, preheated skillet. No extra oil is needed in the pan if you’ve brushed the tortilla.
-
Press Lightly: Use a spatula to press down gently on the quesadilla. This encourages even contact and browning.
-
Flip: Cook for 3-4 minutes, until the bottom is golden brown with some darker spots. Carefully flip it over using a wide spatula.
-
Finish: Cook for another 3-4 minutes on the second side until equally golden and the cheese is fully melted.
-
Rest: Remove from the skillet and let it rest on a cutting board for 1-2 minutes before slicing. This allows the cheese to set slightly, preventing a lava-hot filling from spilling out.
The Batch-Baking Oven Method (Best for a Crowd)
Ideal for making multiple quesadillas at once with minimal hands-on effort.
-
Preheat: Preheat your oven to 400°F (200°C).
-
Prepare Baking Sheet: Line a large baking sheet with parchment paper.
-
Arrange: Place all assembled quesadillas on the sheet in a single layer. Lightly brush the tops with oil or melted butter.
-
Bake: Bake for 8-10 minutes. Carefully flip each quesadilla over.
-
Crisp the Other Side: Bake for another 5-7 minutes, until both sides are golden brown and crisp.
The Quick Air Fryer Method (Fast & Very Crispy)
The air fryer excels at making the tortilla incredibly crispy with little to no oil.
-
Preheat: Preheat your air fryer to 370°F (188°C).
-
Cook: Place one quesadilla in the air fryer basket in a single layer. You may need to cook in batches. Air fry for 5-6 minutes, flipping halfway through, until golden and crispy.
-
Pro Tip: No preheating is necessary for the air fryer, but it helps achieve a crispier result faster.
How to Tell When It’s Done:
-
Visual Cue: The tortilla should be a deep, golden brown with some darker toasted spots.
-
Touch Cue: The exterior should feel firm and crisp to the touch.
-
The Cheese Test: Peek inside; the cheese should be completely melted and oozy.
No matter which method you choose, the result will be a hot, crispy, and utterly satisfying meal. The final step is to add those perfect finishing touches that elevate it from great to extraordinary.
Serving Suggestions: Dips, Sides, and Toppings
A perfectly cooked BBQ chicken quesadilla is a star on its own, but the right accompaniments can turn it into a memorable and well-rounded meal. The ideal dips provide a cool or tangy contrast to the rich, smoky flavors, while the right sides and toppings add freshness, crunch, and complexity. This is your chance to customize and elevate the experience.
The Essential Dipping Sauces:
A great dip is non-negotiable. It adds moisture and a contrasting flavor that enhances every bite.
-
Cooling Creamy Dip: Cooling Creamy Dip: A simple ranch dressing or cooling cilantro-lime crema (made by blending sour cream with lime juice, cilantro, and a pinch of salt) is the classic choice. Its cool, creamy tang cuts through the richness of the cheese and BBQ sauce beautifully.
-
Extra BBQ Sauce: For the true barbecue enthusiast, offering a small bowl of extra warmed barbecue sauce for dipping doubles down on the smoky-sweet flavor.
-
Spicy Kick: Spicy ranch or a sriracha mayo blend (1 part sriracha to 3 parts mayo) provides a creamy heat that complements the sweetness of the filling.
Fresh & Zesty Toppings:
Adding toppings right before serving introduces fresh flavors and textures.
-
Herbaceous Freshness: A generous sprinkle of freshly chopped cilantro or sliced green onions adds a burst of color and a bright, fresh note.
-
Creamy & Cool: Dollops of cooling sour cream or guacamole add a rich, creamy element that balances the heat and smoke.
-
Pickled Tang: A spoonful of pickled red onions or pickled jalapeños cuts through the richness with a sharp, acidic crunch.
Simple, Satisfying Sides:
Choose a side that complements without competing.
-
Light & Fresh: A simple side salad with a sharp lime vinaigrette or a zesty corn and black bean salad provides a refreshing, light contrast.
-
Hearty & Classic: Seasoned black beans or Mexican-style street corn (elote) make the meal more substantial and continue the Southwestern flavor theme.
-
Something Crispy: A handful of light tortilla chips is perfect for scooping up any leftover dip or filling that escapes.
Serving Practicality:
-
The Cut: Always use a sharp pizza cutter or chef’s knife to slice the quesadilla into wedges. This makes it easy to share and perfect for dipping.
-
Presentation: Serve immediately on a large platter with bowls of dips and toppings in the center, allowing everyone to customize their own experience.
With your chosen dips, toppings, and sides, your BBQ Chicken Quesadilla is transformed from a simple snack into a complete, crowd-pleasing meal. The final step is to know how to handle any leftovers, ensuring your delicious creation can be enjoyed all over again.
