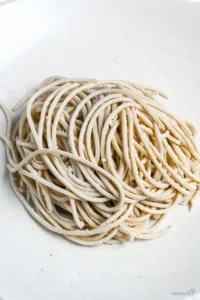
You are currently viewing Crispy Breadcrumb Chicken And Noodles (20-Minute One-Pan Meal!)

Crispy Breadcrumb Chicken And Noodles (20-Minute One-Pan Meal!)

 A Comforting Noodle Bowl with a Crispy Twist

There’s something universally comforting about a bowl of tender noodles and juicy chicken—a simple, satisfying meal that feels like a warm embrace after a long day. But what if you could elevate this classic comfort food into something truly extraordinary with just one simple addition? Imagine that familiar, hearty base now crowned with a generous blanket of crispy, golden, garlic-infused breadcrumbs, adding a thrilling crunch and burst of flavor to every single bite.

This recipe for Chicken Noodles with Crispy Breadcrumbs is exactly that: a humble, weeknight-friendly dish transformed into a textural masterpiece. It’s the perfect answer to the eternal question of what to make for dinner that is both incredibly easy and impressively delicious. Forget complicated sauces or lengthy cooking times; the magic here lies in contrast—the soft, savory noodles against the irresistible, crunchy topping.

Whether you’re cooking for a busy family night or just treating yourself to a meal that feels special without the fuss, this dish delivers. It’s a versatile canvas, too, easily adapted with your favorite herbs, a squeeze of lemon, or a sprinkle of Parmesan. So, grab your skillet and get ready to create a simple noodle dish that is anything but ordinary. Let’s start by gathering the handful of ingredients you’ll need to make it happen.

Essential Ingredients for a Simple, Flavorful Dish

The beauty of this recipe lies in its simplicity. You likely have most of these ingredients already in your pantry, and each one plays a specific, important role in creating a harmonious balance of texture and flavor. This isn’t about a long list of complicated items; it’s about choosing a few key components that work together to build a deeply satisfying meal from the bottom up.

%fChicken Salad with Grapes %

The Foundation: Noodles and Aromatics

  • The Noodles: 8 ounces of your favorite long pasta forms the hearty base. Linguine or fettuccine are ideal choices—their broad, flat surfaces are perfect for catching the crispy breadcrumbs and sauce. However, spaghetti or even egg noodles work perfectly in a pinch.

  • The Aromatics: These are the flavor starters. You’ll need 2-3 cloves of garlic, finely minced, and ½ of a yellow onion, finely diced. Sautéing these in olive oil creates the savory foundation that will perfume the entire dish.

The Star: Chicken and Cooking Fat

  • The Chicken: 1 large boneless, skinless chicken breast (about ½ lb), cut into ½-inch pieces. Cutting it into uniform, bite-sized pieces ensures quick and even cooking, resulting in tender, juicy morsels throughout the dish.

  • The Fat: 2 tablespoons of olive oil is used for sautéing. Its mild fruitiness is the perfect base for building flavor without overpowering the other ingredients.

The Flavor Builders: Sauce and Seasoning

  • The Liquid: 2 cups of low-sodium chicken broth is the secret to a light yet flavorful sauce that clings to the noodles. Using low-sodium broth allows you to control the final seasoning level.

  • The Seasonings: ½ teaspoon of black pepper and 1 teaspoon of Italian seasoning (a blend of oregano, thyme, basil, etc.) provide classic, aromatic depth. You’ll also need salt to taste at the end.

The “Wow” Factor: The Crispy Breadcrumb Topping
This is what transforms the dish from simple to spectacular.

  • The Breadcrumbs: ¾ cup of plain panko breadcrumbs. Panko is preferred for its light, flaky texture that creates an airy, super-crispy crunch rather than a dense, sandy one.

  • The Flavor: 2 tablespoons of olive oil and 1 clove of garlic, minced, are used to toast the panko. This toasting process is non-negotiable—it unlocks a deep, nutty, and incredibly aromatic flavor.

  • The Finisher: 2 tablespoons of freshly chopped parsley and 2 tablespoons of grated Parmesan cheese are stirred into the toasted breadcrumbs right at the end. The parsley adds freshness, and the Parmesan adds a salty, umami punch.

Why This Combination Works:
Each component has a purpose. The chicken and noodles provide hearty substance. The aromatics and broth create a simple but deeply savory sauce. The seasoned, crispy breadcrumb topping delivers the contrasting texture and burst of flavor that makes every bite exciting. With your ingredients gathered, you’re ready to move on to the prep work that makes the cooking process seamless.

Prepping Your Ingredients for a Smooth Cooking Process

A little bit of preparation, known as mise en place (everything in its place), is the secret to a stress-free and efficient cooking experience. Taking just a few minutes to prepare your ingredients before you turn on the stove ensures that everything comes together seamlessly, allowing you to focus on cooking rather than frantic chopping. This organized approach is especially important for a quick-cooking dish like this, where timing is key.

1. Prepare the Aromatics:

  • Garlic: Peel and finely mince 2-3 cloves of garlic. For the best flavor, mince it fresh rather than using pre-minced jarred garlic. Divide the minced garlic in half; one half will be used for sautéing with the chicken, and the other half will be used exclusively for the breadcrumb topping.

  • Onion: Finely dice ½ of a yellow onion. A consistent, small dice will ensure it cooks evenly and melts into the sauce, providing a sweet, savory base.
%fChicken Salad with Grapes %

2. Cut and Season the Chicken:

  • Pat the 1 large chicken breast dry with paper towels. This is crucial for getting a good sear instead of steaming the chicken.

  • Using a sharp knife, cut the chicken into uniform, ½-inch pieces. Consistent size is critical—it guarantees that every piece cooks at the same rate, preventing some from being overcooked and dry while others are underdone.

  • Place the chicken pieces in a bowl and season them lightly with salt and pepper. This initial seasoning will be built upon later.

3. Measure Your Liquids and Dry Ingredients:

  • Measure out 2 cups of low-sodium chicken broth and have it ready next to the stove.

  • Measure 8 ounces of pasta. If using a long pasta like linguine, you can leave it whole; it will break down slightly as it cooks in the broth.

  • Have your ½ teaspoon black pepper and 1 teaspoon Italian seasoning measured and set aside.

4. Prep the Breadcrumb Topping Components:

  • Measure ¾ cup of panko breadcrumbs into a small bowl.

  • Finely chop 2 tablespoons of fresh parsley.

  • Grate 2 tablespoons of Parmesan cheese.

Why This Prep Work Matters:
With your ingredients prepped and within arm’s reach, you eliminate the risk of burning your garlic while you frantically search for the chicken broth. This organized setup transforms cooking from a chaotic race into a calm, enjoyable process. You are now perfectly prepared to start cooking with confidence,
Cooking the Chicken: Tips for Tender, Juicy Bites

The chicken is the hearty, protein-packed core of this dish, and how you cook it will determine whether it’s tender and flavorful or dry and tough. This step is about using simple techniques to lock in moisture and build a savory foundation for the entire recipe. By focusing on the right pan, the right heat, and the right timing, you’ll ensure every piece is perfectly cooked.

1. The Perfect Pan and Heat:

  • Use a large, heavy-bottomed skillet or Dutch oven. This type of pan distributes heat evenly, preventing hot spots that can burn some pieces while undercooking others.

  • Heat 1 tablespoon of olive oil over medium-high heat until it shimmers. The oil should be hot enough that a piece of chicken sizzles immediately upon contact. A properly heated pan is essential for searing, which creates a golden exterior and seals in the juices.

2. The Searing Technique:

  • Pat the seasoned chicken pieces dry one more time right before adding them to the pan. Any excess moisture will cause the chicken to steam instead of sear.

  • Add the chicken in a single, uncrowded layer. If necessary, cook in two batches. Overcrowding the pan will cause the temperature to drop, resulting in steamed, gray, rubbery chicken instead of beautifully browned pieces.

  • Resist the urge to move the chicken immediately. Let it cook undisturbed for 2-3 minutes on the first side. This allows a golden-brown crust to form. Peek underneath one piece; if it’s nicely browned, it’s ready to flip.

3. Finishing the Cook:

  • Flip each piece and cook for another 2-3 minutes on the second side. The chicken is done when it’s opaque throughout and the internal temperature reaches 165°F (74°C).

  • Do not overcook. Chicken breast can go from juicy to dry very quickly. The moment it’s done, transfer it to a clean plate. Leaving it in the hot pan will cause it to continue cooking and become tough.

Pro Tip: The Carryover Cooking Rest
Let the chicken rest on the plate for a few minutes before adding it back to the dish. This allows the muscle fibers to relax and reabsorb their juices, which is the final key to ensuring tender, succulent bites. The flavorful browned bits (the fond) and any rendered fat left in the pan are liquid gold—you’ll use them to build the sauce in the next step.

Your chicken is now perfectly cooked—golden on the outside, juicy on the inside, and full of flavor. It’s ready to be combined with the noodles and sauce. But first, let’s create the dish’s crowning glory: the incredibly crispy, garlicky breadcrumb topping.

Creating the Ultimate Crispy, Flavorful Breadcrumb Topping

This is the step that transforms your dish from a simple noodle bowl into a textural masterpiece. The breadcrumb topping is not an afterthought; it’s a crucial component that provides a satisfying crunch, a nutty depth of flavor, and a aromatic garlic finish that contrasts beautifully with the tender noodles and chicken. Mastering this technique is simple, but the payoff is enormous.

The Right Breadcrumb:

  • Panko is Key: For the lightest, crispiest, and most delicate crunch, ¾ cup of panko breadcrumbs is essential. Their flaky, airy texture creates a topping that is crisp without being dense or hard. Avoid using fine, dry breadcrumbs, as they can become sandy.

The Toasting Process:

%fChicken Salad with Grapes %

  1. Wipe and Reheat: In the same skillet used for the chicken (or a clean one if preferred), heat 2 tablespoons of olive oil over medium heat.

  2. Toast the Garlic: Add the reserved half of your minced garlic to the oil. Cook for just 30-60 seconds, stirring constantly, until it becomes fragrant. Do not let it brown, or it will turn bitter.

  3. Add the Panko: Add the panko breadcrumbs and a pinch of salt to the skillet. Stir constantly to ensure every bit of panko is coated in the garlic-infused oil.

  4. The Golden Rule: Continue toasting, stirring frequently, for 5-7 minutes. The panko will slowly turn from white to a deep, golden brown. This patient toasting is what develops the rich, nutty flavor. If the panko is browning too quickly, reduce the heat.

The Finishing Touches:

  • Once the panko is uniformly golden and crisp, immediately remove the skillet from the heat. This stops the cooking process and prevents burning.

  • Transfer the toasted breadcrumbs to a small bowl. Stir in the 2 tablespoons of freshly chopped parsley and 2 tablespoons of grated Parmesan cheese. The residual heat will wilt the parsley slightly and melt the cheese just enough to help it cling to the breadcrumbs.

Why This Method Works:
Toasting the breadcrumbs in garlic oil infuses them with flavor from the inside out. Adding the parsley and cheese off the heat preserves their fresh, bright qualities and prevents the cheese from clumping or becoming greasy.

Your breadcrumb topping is now complete—irresistibly crispy, fragrant, and packed with savory flavor. Set it aside while you build the main dish. It will be the glorious, crunchy finish added just before serving. Next, we’ll cook the noodles and build the simple, savory sauce that brings everything together.

Building the Savory Sauce and Cooking the Noodles

This is where the magic of a one-pan meal truly happens. Instead of boiling noodles separately in plain water, you’ll cook them directly in a flavorful broth, allowing them to absorb all the savory goodness and release their starches to create a light, silky sauce that clings perfectly to every strand. This method, known as the pasta risottata technique, is the secret to incredibly flavorful noodles with minimal cleanup.

Building the Sauce Base:

  1. Sauté the Aromatics: In the same skillet used for the chicken (with those delicious browned bits still intact), add another 1 tablespoon of olive oil if the pan is dry. Heat over medium heat. Add the diced onion and cook for 3-4 minutes, until softened and translucent.

  2. Add Garlic: Add the remaining half of the minced garlic and cook for just 30 seconds until fragrant.

  3. Deglaze: Pour in the 2 cups of low-sodium chicken broth. Use a wooden spoon to scrape up all the browned bits (fond) from the bottom of the pan. This is packed with flavor and will form the foundation of your sauce.

  4. Season: Stir in the 1 teaspoon of Italian seasoning and ½ teaspoon of black pepper. Let the broth come to a gentle boil.

Cooking the Noodles:

  1. Add the Pasta: Break the 8 ounces of linguine or fettuccine in half and add it to the boiling broth, submerging it as much as possible. The pasta will soften as it cooks.

  2. Simmer and Stir: Reduce the heat to a lively simmer. Cook for the time indicated on the pasta package (usually 9-11 minutes), stirring frequently and turning the pasta with tongs. As the noodles cook, they will release their starches into the broth, which will naturally thicken it into a light sauce.

  3. Check Liquid: If the liquid reduces too much before the pasta is al dente, add a splash of water or more broth. You’re aiming for a saucy consistency, not soupy or dry.

The Final Consistency:
Once the pasta is al dente and the liquid has reduced to a sauce that coats the noodles, you have reached the perfect consistency. The sauce will not be thick like a cream sauce, but rather a light, flavorful glaze.

Your noodles are now perfectly cooked and infused with the savory essence of the broth, garlic, and herbs. The foundation of your dish is complete. All that’s left is to bring the chicken back into the fold and crown it with its crispy, golden topping.

Bringing It All Together: The Final Assembly

The moment has arrived to unite your perfectly cooked components into a harmonious and complete dish. This final step is about gentle combination and thoughtful presentation, ensuring each element retains its unique character while contributing to a greater whole. The goal is a cohesive bowl where the tender noodles and chicken are napped in a light sauce, all ready to be crowned with its crispy, flavorful topping.

The Gentle Reunion:

  1. Return the Chicken: With the heat reduced to low, add the rested, cooked chicken pieces and any accumulated juices back into the skillet with the sauced noodles.

  2. Combine with Care: Using tongs or a large spoon, gently toss everything together until the chicken is evenly distributed and heated through. This should only take about 1-2 minutes. The residual heat will warm the chicken without overcooking it.

Tasting and Adjusting:
This is the most important step for a perfectly seasoned dish. Before serving, always taste and adjust.

  • Does it need more salt? Add it now, little by little.

  • Would a squeeze of fresh lemon juice brighten the flavors? A tablespoon can work wonders.

  • Does it need a pinch more black pepper or red pepper flakes for heat?

Plating for Impact:

  • Use tongs to twist and lift portions of the noodle and chicken mixture into shallow bowls. This creates an appealing, elegant nest.

  • Spoon any remaining sauce from the pan over the top.

The Grand Finale: The Topping

  • Generously sprinkle the crispy garlic-Parmesan breadcrumb topping over each portion.

  • For the absolute best experience, add the breadcrumbs just before serving. This preserves their signature crunch, ensuring they provide that satisfying textural contrast against the soft noodles.

Your dish is now complete—a beautiful, restaurant-quality meal made in a single pan. The tender noodles and juicy chicken are enveloped in a light, savory sauce, all perfectly set off by the crispy, aromatic breadcrumb finish. The final touch is to add any fresh garnishes that will make it truly your own.

Serving Suggestions: Garnishes and Perfect Pairings

A great dish becomes an exceptional meal with the right finishing touches. While your Chicken Noodles with Crispy Breadcrumbs is delicious on its own, a few thoughtful garnishes and side dishes can elevate it, adding freshness, contrast, and visual appeal. These simple additions allow everyone to customize their bowl and create a more well-rounded dining experience.

The Essential Garnishes (Add Right Before Serving):

  • Fresh Herbs: A final sprinkle of chopped fresh parsley or thinly sliced basil adds a pop of color and a burst of freshness that cuts through the richness of the dish.

  • Citrus Zest: A light grating of lemon zest over the top just before serving brightens all the flavors and complements the garlicky breadcrumbs beautifully.

  • Cheese: An extra dusting of grated Parmesan or Pecorino Romano cheese adds a salty, umami-rich finish for those who love an extra cheesy bite.

  • Brightness: A drizzle of extra virgin olive oil or a squeeze of fresh lemon juice can enhance the flavors and add a lovely sheen.

Simple Side Dishes to Complete the Meal:

  • A Light Salad: A simple arugula salad with a lemon vinaigrette or a classic Italian salad provides a crisp, acidic contrast that cleanses the palate between bites of the savory noodles.

  • Green Vegetable: Serve with a side of steamed broccoliroasted asparagus, or sautéed green beans for an easy way to add color and nutrition to the meal.

  • Bread: A slice of crusty garlic bread or a warm dinner roll is perfect for soaking up any remaining sauce left in the bowl.

Serving Practicality:

  • Family Style: For a casual family dinner, bring the entire skillet to the table along with small bowls of garnishes like extra Parmesan, red pepper flakes, and chopped parsley. Let everyone serve themselves and customize their portion.

  • Plated Elegance: For a more formal presentation, use tongs to twirl the noodles into a neat nest in the center of shallow bowls, place the chicken around it, and artfully sprinkle the breadcrumbs and garnishes on top.

With your dish beautifully garnished and paired with the perfect sides, your Chicken Noodles with Crispy Breadcrumbs is transformed from a simple skillet dinner into a complete, restaurant-worthy meal. The final step is to know how to enjoy any leftovers, ensuring your delicious creation can be savored all over again.

 Make-Ahead Tips and Storing Leftovers

A well-organized cook knows that a fantastic meal can be even better with a little planning. While this dish is best enjoyed fresh, you can easily prepare components in advance to get dinner on the table in record time. And for those times when you have leftovers, knowing how to store and reheat them properly will preserve that wonderful texture.

Smart Make-Ahead Strategies:

  • The Breadcrumb Topping: This is the best component to make ahead. Prepare the crispy breadcrumb topping and let it cool completely. Store it in an airtight container at room temperature for up to 3 days. This saves time and ensures it stays crisp.

  • Prep the Ingredients: Chop the onion, mince the garlic, cut the chicken, and measure out your seasonings and broth. Store each in separate containers in the refrigerator for up to 24 hours.

  • Cook the Chicken: You can cook the chicken pieces 1 day in advance. Let them cool, store them in an airtight container in the refrigerator, and gently reheat them in the sauce when you assemble the dish.

Storing Leftovers:

  • Important Note: For the best quality, store the crispy breadcrumb topping separately from the noodle and chicken mixture.

  • Noodle Mixture: Place the leftover noodle and chicken mixture in an airtight container in the refrigerator for up to 3 days.

  • Breadcrumbs: Keep them in their airtight container at room temperature.

Reheating for Best Results

  • Reheat Gently: Place the noodle mixture in a skillet with a splash of chicken broth or water over medium-low heat. Stir gently until heated through. This method helps rehydrate the sauce without making the noodles mushy.

  • Avoid the Microwave: Microwaving can make the noodles rubbery and the chicken dry.

  • Restore the Crunch: Right before serving, sprinkle the reserved crispy breadcrumbs over the reheated noodles. This will restore the essential contrasting texture.


Heading 9: Answers to Common Questions (FAQ)

Q1: Can I use a different type of pasta?
A: Absolutely. While linguine or fettuccine are ideal for catching the breadcrumbs, other pasta shapes like spaghetti, tagliatelle, or even short pasta like rigatoni will work. Adjust the cooking time according to the package instructions.

Q2: My breadcrumbs got soft. How can I make them crispy again?
A: Spread the leftover breadcrumbs in a single layer on a baking sheet and toast them in a 300°F (150°C) oven for 5-7 minutes, watching closely to prevent burning. Let them cool before using.

Q3: Can I make this recipe gluten-free?
A: Yes! Use your favorite gluten-free pasta and ensure your chicken broth is gluten-free. For the breadcrumbs, use certified gluten-free panko or make your own from gluten-free bread.

Q4: How can I add more vegetables to this dish?
A: This is a great way to boost nutrition. Add vegetables like spinach, peas, or chopped broccoli in the last 3-4 minutes of the pasta cooking time so they can steam in the broth. Sautéed mushrooms would also be a delicious addition.

Q5: Can I use pre-cooked chicken?
A: Yes. If using pre-cooked chicken (like rotisserie chicken), add it in the last 2-3 minutes of cooking just to warm through. This will prevent it from becoming dry and tough.


Heading 10: Conclusion: Your New Go-To Weeknight Noodle Dinner

You started with a simple concept—noodles and chicken—and transformed it into something truly special with one brilliant addition: a crispy, garlicky, Parmesan-laced breadcrumb topping. This recipe is more than just a set of instructions; it’s a formula for creating a quick, satisfying, and deeply flavorful meal that feels far more sophisticated than the effort required.

You’ve learned the techniques that make it foolproof: how to cook chicken to juicy perfection, how to build a simple but savory sauce, and, most importantly, how to create that unforgettable crunchy topping that elevates every bite.

This dish is now your secret weapon for busy weeknights, a reliable recipe you can customize with your favorite herbs, vegetables, or pasta. It’s a reminder that the best meals don’t have to be complicated—they just need to be made with care and a few smart tricks.

So, the next time you’re wondering what to make for dinner, remember this recipe. In the time it takes to decide on takeout, you can create a homemade meal that is comforting, crispy, and utterly delicious.

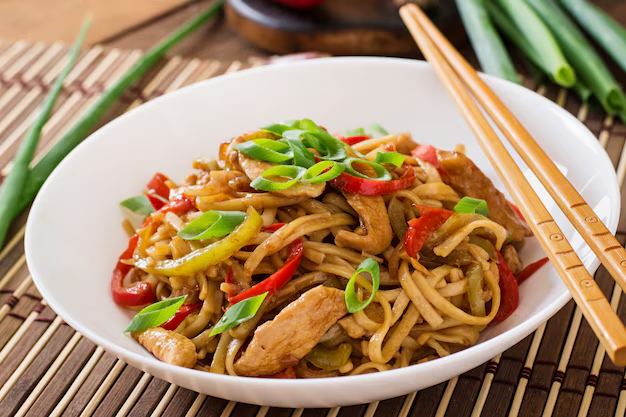
Nutrition Facts

  • Serving Size: 1 ½ cups

  • Recipe Yields: 4 servings

  • Note: Nutrition is estimated based on using olive oil, chicken breast, and regular pasta. Values will vary based on specific ingredients.

Nutrient Amount % Daily Value*
Calories 420
Total Fat 14 g 18%
Saturated Fat 2.5 g 13%
Cholesterol 65 mg 22%
Sodium 480 mg 21%
Total Carbohydrate 45 g 16%
Dietary Fiber 3 g 11%
Sugars 4 g
Protein 28 g 56%
Vitamin D 0.2 mcg 2%
Calcium 45 mg 4%
Iron 2.5 mg 14%
Potassium 420 mg 8%

Percent Daily Values are based on a 2,000 calorie diet. Your daily values may be higher or lower depending on your calorie needs.