Why This Chicken Enchilada Recipe is a Keeper
There is a moment of pure culinary magic that occurs when a simple collection of ingredients—tender chicken, soft tortillas, aromatic spices, and a vibrant sauce—is transformed into a dish that feels like a celebration. It’s the moment you pull a steaming, cheese-topped pan of chicken enchiladas from the oven, filling your kitchen with an irresistible aroma that promises a meal of deep comfort and robust flavor. This is more than just another chicken enchilada recipe; this is a carefully crafted guide designed to deliver that exact moment of perfection to your table, making you the hero of dinner time.
Many home cooks are familiar with the disappointment of enchiladas that fall short of the dream: tortillas that tear and become mushy, a filling that tastes bland and dry, or a sauce that lacks depth. These common frustrations end here. We have dedicated ourselves to perfecting every element of this classic dish, from the technique of warming the tortillas to prevent cracking to the precise balance of spices in the filling that makes it truly unforgettable. The result is a foolproof, authentic-tasting chicken enchilada recipe that consistently produces beautiful, flavorful results worthy of a family feast or a casual dinner party with friends.
So, what exactly makes this recipe a “keeper” that you’ll return to again and again?
First, it’s about achievable authenticity. We strike the perfect balance between from-scratch flavor and practical, manageable steps. You will learn how to build layers of flavor using accessible ingredients without spending hours in the kitchen. Second, this recipe is incredibly adaptable. Whether you prefer your enchiladas smothered in a rich red chili sauce or a tangy verde, filled with a simple shredded chicken blend or loaded with extra beans and corn, this guide provides the foundational framework and creative variations to make the dish your own. Finally, it’s unfailingly reliable. The instructions are clear, tested, and designed to ensure success, whether you’re a seasoned cook or a beginner making enchiladas for the very first time.
You are about to create a dish that is profoundly satisfying—a harmonious combination of savory, spiced chicken, soft tortillas, and melted cheese, all enveloped in a signature sauce. This chicken enchilada recipe is crafted to become a cherished staple in your cooking repertoire, a go-to meal that gathers everyone around the table with anticipation. Let’s begin this journey by gathering the essential ingredients that form the foundation of incredible flavor.
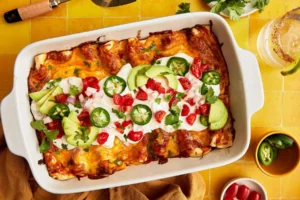
Essential Ingredients for Authentic Chicken Enchiladas
The journey to exceptional enchiladas begins not at the stove, but at the grocery store or in your pantry. The choice of each component in this chicken enchilada recipe is a deliberate step toward building the complex layers of flavor and texture that define an authentic, memorable dish. This is not about an exhaustive list of obscure ingredients; it is about understanding the role of each element and selecting quality staples that will work in harmony. Think of yourself as an architect—these are your building materials, and their quality will directly influence the structural integrity and final beauty of your creation.
To set you up for absolute success, we have organized the ingredients into their core functional groups. This approach ensures you understand not just what you need, but why you need it.
The Foundation: Chicken and Aromatics
-
Chicken: The star of the filling. We recommend 1.5 pounds of boneless, skinless chicken breasts or thighs. Thighs will yield a slightly more flavorful and moist filling due to their higher fat content, but breasts are a fantastic lean option. The recipe will guide you through poaching them to tender, shreddable perfection.
-
Aromatics: These are the non-negotiable flavor starters. One large yellow onion, finely diced, and 3-4 cloves of garlic, minced, will be sautéed until fragrant to create a savory base that infuses the entire filling with depth.
The Soul: Enchilada Sauce
This is the most critical flavor component. You will need approximately 3 cups of enchilada sauce.
-
The Homemade Route: For the ultimate depth of flavor, a homemade sauce is unparalleled. This typically requires tomato sauce, chicken broth, a blend of chili powder, cumin, oregano, and a touch of flour for thickening. A dedicated section following this one will guide you through selecting or making the perfect sauce.
-
The Quality Store-Bought Shortcut: If time is short, choosing a high-quality store-bought sauce is perfectly acceptable. Look for brands with a short ingredient list, devoid of excessive sugar or artificial thickeners. A quick tip: sautéing a little extra garlic and chili powder into a jarred sauce can wonderfully elevate its flavor profile.
The Vessel: Tortillas
The choice of tortilla is crucial for structural integrity and authentic taste. You will need 10-12 tortillas.
-
Corn Tortillas (Traditional Choice): Highly recommended for their genuine flavor and sturdiness against the sauce. Their slightly gritty texture soaks up sauce beautifully without becoming overly mushy. A pro tip: briefly frying them in hot oil before rolling is non-negotiable—it makes them pliable so they don’t crack and adds a rich, toasted corn flavor.
-
Flour Tortillas (Modern Alternative) are a popular, softer alternative that are easier to roll but can become softer in the final dish.
The Harmony: Spices and Seasonings
This is where your filling transforms from simple chicken into a flavor explosion. Forget pre-packaged seasoning packets. The magic is in combining:
-
Chili Powder: The main event, providing earthy heat and color. (2 tablespoons)
-
Ground Cumin: Offers a warm, smoky, and slightly citrusy backbone. (1 teaspoon)
-
Dried Oregano: (Preferably Mexican oregano) introduces a subtle, earthy bitterness. (1 teaspoon)
-
Smoked Paprika: Adds a gentle smokiness and a vibrant red hue. (1 teaspoon)
-
Salt and Black Pepper: Essential for enhancing and balancing all other flavors.
The Glory: Cheese and Garnishes
-
Cheese: For the ideal melt and flavor, we recommend 3 cups of a blend—sharp cheddar for its tangy punch and Monterey Jack or Quesadilla cheese for its superb, creamy meltability. Crucial note: shredding your own cheese from a block is highly advised, as pre-shredded bags contain anti-caking agents that can result in a grainy, less smooth melt.
-
Garnishes (The Finishing Touch): These add fresh, bright contrast to the rich, baked dish. Plan for:
-
Fresh chopped cilantro
-
Diced red onion or white onion
-
Sour cream or Mexican crema
-
Sliced avocado or a dollop of guacamole
-
A squeeze of fresh lime juice
-
With your ingredients assembled, you are now prepared to move to the next, most satisfying phase: creating the deeply flavorful filling that will be the heart of your enchiladas.
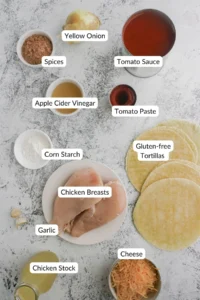
A Quick Guide to Selecting Your Enchilada Sauce
The soul of any exceptional enchilada lies within its sauce. This liquid gold does far more than merely moisten the dish; it delivers the foundational character, deep complexity, and authentic essence that elevates your cooking from a simple assembly of ingredients to a memorable culinary experience. The path you choose—whipping up a homemade batch or selecting a quality store-bought version—will define the personality of your final dish. This guide is designed to demystify that choice, empowering you to make the best decision for your kitchen, your schedule, and your palate.
Crafting Your Own: The Homemade Sauce Advantage
For those who seek ultimate control over flavor and authenticity, crafting your sauce from scratch is a rewarding endeavor. A homemade enchilada sauce typically begins with a base of dried or fresh chilies, toasted and blended with aromatics like garlic and onion, and simmered with broth and a precise blend of spices such as cumin, oregano, and a touch of Mexican chocolate for depth. The advantages are significant: you can adjust the heat level to your exact preference, control the sodium content, and achieve a vibrant, fresh flavor that simply cannot be found in a jar. The process itself, which fills your kitchen with an incredible aroma, is part of the authentic experience. While it requires an additional 20-30 minutes, the payoff in flavor is immense and well worth the effort for a special meal or for the purist cook.
The Savvy Shortcut: Navigating Store-Bought Sauces
We fully recognize that time is often the most precious ingredient. The market is filled with countless brands of pre-made enchilada sauce, ranging from mediocre to excellent. The key to success here is being an informed consumer. When selecting a sauce, make a habit of reading the ingredient list. Seek out options with recognizable, whole ingredients—like various chilies, tomatoes, garlic, and spices—and avoid those with excessive sugar, artificial flavors, or a long list of preservatives. To elevate a good store-bought sauce into a great one, employ a simple “doctoring” technique: sauté a clove of minced garlic and a half tablespoon of chili powder in a teaspoon of oil until fragrant, then whisk in the jarred sauce and let it simmer for 5-10 minutes. This quick step adds a layer of fresh, toasted flavor that bridges the gap between homemade and convenience.
Making Your Final Choice: A Summary
Your decision ultimately hinges on your goals for the meal. If your priority is achieving deep, authentic flavor and you enjoy the process of cooking, the homemade route is highly recommended. If you need to get a delicious, satisfying dinner on the table with maximum efficiency, a high-quality store-bought sauce, perhaps with the quick doctoring method, is a perfectly brilliant choice. There is no wrong answer, only a well-informed one. Whichever path you choose, you are now equipped with the knowledge to proceed confidently.
With your sauce selected and ready, the next step is to bring the heart of the enchilada to life: creating the flavorful, spiced chicken filling that will be nestled inside each tortilla. Let’s move on to building that delicious core.
Step-by-Step Instructions: Preparing the Filling
The filling is the flavorful heart of your enchilada, and mastering its preparation is the key to transforming simple shredded chicken into a deeply savory, aromatic, and moist center that will make your dish truly unforgettable. This process is about building and layering flavors in a specific sequence to create a complex and cohesive mixture. Follow these steps carefully to ensure every bite is packed with the perfect balance of spice, savoriness, and texture.
Step 1: Cook and Shred the Chicken
Begin by poaching your chicken to ensure it remains tender and juicy. Place 1.5 pounds of boneless, skinless chicken breasts or thighs in a single layer in a large skillet or pot. Cover the chicken with chicken broth or water by about an inch. Bring the liquid to a gentle boil over medium-high heat, then immediately reduce the heat to low, cover the pot, and let it simmer for 15-20 minutes, or until the chicken is cooked through and easily shreds with a fork. Avoid overcooking, as this will make the chicken dry and tough. Once cooked, remove the chicken from the liquid and let it cool slightly. Using two forks or your hands, shred the chicken into fine, uniform pieces. Using the chicken broth for poaching, rather than water, will infuse the meat with an extra layer of flavor.
Step 2: Sauté the Aromatics
While the chicken is cooling, heat one tablespoon of vegetable or avocado oil in a large skillet over medium heat. Add the finely diced yellow onion and cook for 4-5 minutes, stirring occasionally, until it becomes soft and translucent. Next, add the minced garlic and cook for an additional minute until it becomes incredibly fragrant. This step is crucial; it unlocks the foundational flavors of the dish and ensures your filling will have a savory depth, not a raw, sharp onion or garlic taste.
Step 3: Bloom the Spices
This is the secret technique that separates a good filling from a great one. With the skillet still over medium heat, add the 2 tablespoons of chili powder, 1 teaspoon of ground cumin, 1 teaspoon of dried oregano, and 1 teaspoon of smoked paprika to the onion and garlic mixture. Stir constantly for about 30 seconds to a minute. You will know it’s ready when the spices become fragrant and the oil takes on a deep red color. This process, called “blooming,” toasts the spices in the oil, releasing their essential oils and intensifying their flavor exponentially. It is a non-negotiable step for an authentic taste.
Step 4: Combine and Simmer
Add the shredded chicken to the skillet with the bloomed spices and aromatics. Pour in about ½ cup of chicken broth or reserved poaching liquid and stir everything together until the chicken is evenly coated in the flavorful spice paste. Allow the mixture to simmer for 3-5 minutes, stirring occasionally, until most of the liquid has been absorbed. This simmering step allows the chicken to fully rehydrate and soak up all the incredible flavors you’ve built in the pan. Finally, season the mixture generously with salt and black pepper to taste. Your filling should be moist but not watery.
Step 5: Taste and Adjust
Before you begin assembling, always taste your filling. This is your last chance to adjust the seasoning. Does it need more salt? A pinch more cumin? Adjust accordingly. At this stage, you can also stir in any additional mix-ins, such as a can of drained black beans or corn.
Your filling is now perfectly seasoned, moist, and bursting with authentic flavor. It is ready to be enveloped in warm tortillas and brought together with your chosen sauce. Let’s move on to the art of assembly.
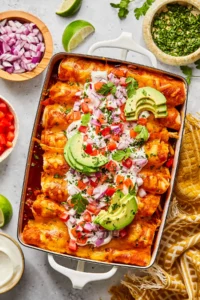
How to Assemble Perfect, Leak-Free Enchiladas
Mastering the assembly is the crucial bridge between a bowl of delicious filling and a stunning, restaurant-quality casserole. This step ensures each enchilada is structurally sound, evenly sauced, and bakes into a cohesive dish rather than a messy, broken, or dry one. The goal is to create individual rolls that are moist throughout, with a beautifully browned top, and no soggy bottom. Follow this detailed, step-by-step guide for flawless results every time.
Step 1: The Essential Tortilla Prep (The Non-Negotiable Step)
If you are using corn tortillas, do not skip this step. Cold corn tortillas will crack and split when you try to roll them, leading to a frustrating mess. You must warm them to make them pliable.
-
The Pan-Fry Method (Recommended for Flavor): Heat about ¼ inch of a neutral oil (like vegetable or avocado oil) in a skillet over medium heat. Using tongs, dip a tortilla into the hot oil for just 5-10 seconds per side, until it becomes soft and flexible. You are not frying it to a crisp; you are just warming it through. Blot the excess oil on a paper towel. This method not only prevents cracking but also adds a rich, toasted corn flavor and creates a slight barrier that helps the tortilla resist absorbing too much sauce too quickly, preventing sogginess.
-
The Steam Method (A Lighter Option): Wrap a stack of 5-6 tortillas in a damp paper towel and microwave for 45-60 seconds, until warm and soft. This works in a pinch but doesn’t add the flavor benefit of the quick fry.
Step 2: The Setup for Efficient Assembly (Mise en Place)
Before you start rolling, set up an assembly line. You will need:
-
Your plate of warm, prepared tortillas.
-
Your skillet of flavorful chicken filling.
-
Your chosen enchilada sauce.
-
A 9×13 inch baking dish.
-
A portion of your shredded cheese (set aside about a third for the topping).
Step 3: The Saucing of the Dish
Pour about ½ cup of your enchilada sauce into the bottom of the baking dish and use a spoon to spread it into a thin, even layer. This initial layer of sauce is critical—it prevents the tortillas from sticking directly to the hot bottom of the dish and burning, and it starts the steaming and flavor-soaking process from the moment the dish goes into the oven.
Step 4: The Rolling Technique
Take one warm tortilla and lay it flat on a clean work surface or hold it in your hand. Using a spoon, place a generous ⅓ to ½ cup of the chicken filling in a line down the center of the tortilla. Be careful not to overfill, as this will make rolling difficult and cause the enchiladas to burst open during baking.
Sprinkle a small pinch of your shredded cheese over the filling. This little bit of cheese inside each roll will melt and act as a delicious “glue,” helping to hold the enchilada together.
Now, fold the two sides of the tortilla over the filling, slightly overlapping them in the middle to create a tight cylinder or roll. Gently place the enchilada seam-side down in the sauced baking dish. Nestle each subsequent enchilada snugly against the previous one; this helps them hold their shape during baking.
Step 5: Saucing and Cheesing the Top
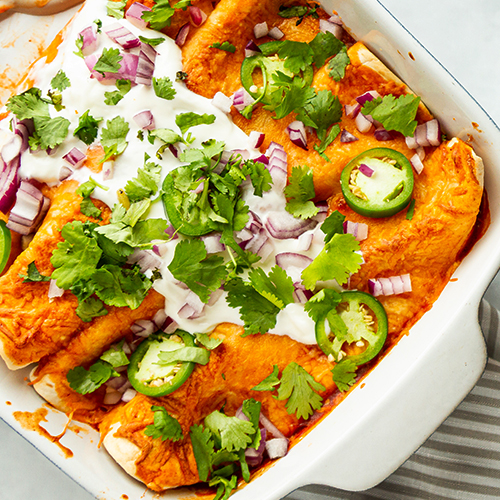
Once all enchiladas are neatly arranged in the dish, it’s time for the final layer. Pour the remaining enchilada sauce evenly over the top of the rolled enchiladas. Use a spoon to ensure the sauce drips down the sides and covers every bit of the tortillas; any exposed tortilla will become hard and crispy in the oven.
Finally, sprinkle the remaining shredded cheese generously and evenly over the sauced enchiladas. The cheese will melt into a gorgeous, golden-brown blanket as it bakes.
Your masterpiece is now assembled and ready for the oven. This careful process guarantees enchiladas that are perfectly sauced, structurally sound, and destined for a bubbly, cheesy, glorious finish. Let’s move on to the final act: baking them to perfection.
Baking to Perfection: Timing and Temperature
The final transformation of your enchiladas happens in the oven, where heat works its magic to meld flavors, melt cheese into a golden blanket, and warm the filling to its core. Baking is not merely a step; it’s the culmination of your careful preparation. Understanding the precise timing and temperature is essential to achieve the ideal texture—a harmonious balance between a bubbly, slightly crispy top and a moist, thoroughly heated interior without a soggy bottom.
Preheating: The Critical First Step
Always begin by preheating your oven to 350°F (175°C). This moderate temperature is the sweet spot for enchiladas. It is hot enough to heat the dish through efficiently and melt the cheese beautifully, but gentle enough to prevent the exposed edges of the tortillas from burning before the center is hot. Placing a cold dish into a cold oven will result in uneven cooking and a soupy texture. A properly preheated oven ensures the baking process starts immediately and consistently.
The Ideal Baking Time
Once your assembled dish is ready, place it uncovered in the center of the preheated oven. The bake time will typically range from 20 to 30 minutes. The exact time depends on a few factors:
-
The Starting Temperature: If you assembled the enchiladas with cold filling and cold sauce directly from the refrigerator, they will need the full 30 minutes, or potentially a few minutes more.
-
The Depth of Your Dish: A standard 9×13-inch dish usually takes 25 minutes. A ceramic or stoneware dish, which retains heat differently than metal, may require a slightly longer bake time.
-
Your Oven: Know your appliance. Ovens can have hot spots or run slightly hot or cold. Begin checking your enchiladas at the 20-minute mark.
How to Know When They Are Perfectly Done
Do not rely solely on the timer. Look for these visual and auditory cues:
-
The Cheese: The cheese on top should be completely melted, bubbly, and have light golden-brown spots. This is the most obvious sign.
-
The Sauce: The sauce around the edges of the baking dish should be bubbling vigorously. You should be able to hear a gentle, active sizzle if you listen closely.
-
The Internal Temperature: For absolute certainty, an instant-read thermometer inserted into the center of an enchilada should read 165°F (74°C), indicating the filling is hot all the way through.
The “Resting Period”: A Non-Negotiable Final Step
Perhaps the most important—and most often skipped—step is letting the enchiladas rest. As soon as you remove the baking dish from the oven, place it on a heat-safe surface and let it sit for 10-15 minutes before serving.
This rest period is not optional; it is functionally essential. It allows the molten filling and sauce to cool slightly and set. If you cut into them immediately, the filling will likely spill out, and the structure will collapse, turning your beautiful work into a soupy mess. This brief wait allows the starches in the tortillas to fully absorb the sauce, resulting in a perfect, cohesive texture where every element holds together on your spoon or spatula.
Your enchiladas are now baked to golden, bubbly perfection and have rested properly. They are ready to be garnished and served, promising a flawless dining experience. Let’s move on to the final touches that will make your dish shine.
The journey from oven to table is your final opportunity to elevate your enchiladas from a simple baked casserole to a vibrant, restaurant-quality meal. The right toppings provide crucial elements of contrast: fresh, cool, creamy, and crisp textures that cut through the rich, savory, and cheesy warmth of the enchiladas. Thoughtful side dishes turn them into a complete and satisfying feast. This guide will help you create a stunning presentation and a perfectly balanced plate.
The Fresh Garnishes: Adding Brightness and Contrast
These are the non-negotiable finishing touches that should be served at the table, allowing everyone to customize their plate. They provide a burst of freshness that enhances every bite.
-
Fresh Herbs: A generous scattering of chopped fresh cilantro is a classic and essential garnish. Its bright, citrusy flavor is the perfect counterpoint to the rich sauce and cheese.
-
Dairy-Based Coolness: A dollop of cooling sour cream or Mexican crema (a slightly thinner, tangier cream) adds a luxurious, creamy element that balances the heat and richness.
-
A Touch of Crunch: Diced white or red onion provides a sharp, crisp textural contrast. For a milder option, quickly pickle thin slices of red onion in lime juice for 15 minutes.
-
Creamy Fat: Sliced avocado or a spoonful of chunky guacamole adds a rich, buttery component that complements the spiced chicken beautifully.
-
The Acidic Finish: Wedges of fresh lime served on the side are crucial. A quick squeeze of lime juice just before eating brightens all the flavors and ties everything together.
The Perfect Side Dishes: Building a Cohesive Meal
While enchiladas are the star, the right sides ensure the meal is balanced and satisfying. Consider these classic and complementary options:
-
Spanish Rice (Arroz Rojo): This is the most traditional and perfect pairing. The flavorful, tomato-based rice with peas and carrots soaks up any extra sauce and completes the plate.
-
Classic Refried Beans: Creamy, savory refried beans (whether made from pinto or black beans) provide a hearty and protein-rich element that makes the meal even more filling.
-
A Simple Green Salad: A light salad with a bright, citrusy vinaigrette (like lime-cilantro) helps cut through the richness of the main dish. Keep it simple with romaine lettuce, a few cherry tomatoes, and red onion.
-
Elote (Mexican Street Corn) or Esquites: For a true celebration, serve grilled corn on the cob slathered with mayonnaise, cotija cheese, chili powder, and lime. For a easier, off-the-cob version, serve esquites (a corn salad) in a bowl.
Serving Practicalities:
-
The Right Tool: Use a large, wide spatula to carefully lift out one or two enchiladas onto each plate without breaking them.
-
Family-Style vs. Plated: For a casual family dinner, place the baking dish in the center of the table with all garnishes and sides in separate bowls, allowing everyone to build their own plate. For a more formal gathering, plate the enchiladas individually, artfully adding the sides and garnishes for a chef-inspired presentation.
With your enchiladas perfectly baked, your garnishes prepped, and your sides ready, you are moments away from serving a truly memorable and complete meal. Next, we’ll cover how to handle any leftovers to ensure your culinary effort lasts.
Expert Tips for Make-Ahead and Storage
A great chicken enchilada recipe is not just about the meal you eat tonight; it’s a gift that keeps on giving. Whether you’re a meticulous meal-prepper or simply dealing with the happy problem of leftovers, knowing how to properly store, freeze, and reheat your enchiladas is essential. These expert strategies will ensure your efforts are preserved with their flavor and texture intact, providing you with delicious, ready-to-eat meals for days to come.
Make-Ahead Mastery: Assembling in Advance
The beauty of this dish is that it can be prepared entirely in advance, making it a superstar for entertaining or busy weeks.
-
Full Casserole Method: You can assemble the entire enchilada casserole—tortillas rolled with filling, sauced, and topped with cheese—cover the baking dish tightly with plastic wrap or aluminum foil, and refrigerate it for up to 24 hours before baking. When you’re ready to cook, let the dish sit on the counter for 20-30 minutes to take the chill off while the oven preheats. You may need to add 5-10 minutes to the baking time since you are starting with a cold dish.
-
Component Prep Method: For even greater flexibility, prepare the individual components ahead of time:
-
The shredded chicken filling can be stored in an airtight container in the refrigerator for up to 3 days.
-
The enchilada sauce (homemade or store-bought) can be stored separately for up to 5 days.
-
The cheese can be shredded and kept in a container.
When ready to eat, simply warm the tortillas, assemble, and bake. This method ensures the freshest possible texture.
-
Proper Storage for Leftovers
Leftover enchiladas are a treasure. To store them correctly:
-
Allow the baked enchiladas to cool completely to room temperature. This prevents condensation from forming inside the storage container, which would make the tortillas soggy.
-
Place them in an airtight container. You can store individual portions or the entire batch.
-
Refrigerate for up to 4 days.
Freezing for Long-Term Storage
Enchiladas freeze exceptionally well, making them the perfect emergency meal.
-
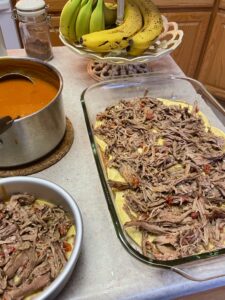
To Freeze a Whole Casserole: Assemble the dish in a freezer-safe baking dish. Instead of topping with cheese, wrap the entire unbaked dish first in a layer of plastic wrap, pressing it directly onto the surface of the sauce to prevent freezer burn. Then, wrap it tightly in a layer of heavy-duty aluminum foil. Label it with the date and contents. Freeze for up to 3 months.
-
To Freeze Individual Portions: This is ideal for quick lunches or dinners for one or two. Place 1 or 2 cooled, baked enchiladas in a single layer in a freezer-safe container or a heavy-duty freezer bag. Remove as much air as possible before sealing.
-
Thawing and Reheating: For best results, thaw frozen enchiladas overnight in the refrigerator.
-
To reheat a full casserole: Remove the plastic wrap, cover the dish with foil, and bake at 350°F (175°C) until heated through (about 30 minutes for a thawed casserole). Remove the foil for the last 10 minutes to re-crisp the cheese.
-
To reheat individual portions: Place them on a microwave-safe plate and heat in 60-second intervals until hot. For a better texture, use an air fryer or toaster oven at 350°F (175°C) for 10-15 minutes, which will restore a crispy top.
-
By mastering these storage techniques, you ensure that your delicious chicken enchilada recipe continues to deliver convenience and satisfaction long after the initial preparation. Next, we’ll address the most common questions to troubleshoot any uncertainties.

